Home Recipes

Who do not love foods? I love food a lot. Also, I love to cook. In our house, we cook a lot of foods every day. Actually, I am from South Asia. So, I have different cultural foods. In addition, I also love to go different restaurants for getting western food taste. I am living in USA last 10 years. So, I tried huge number of restaurants in USA. That is amazing for me. So, I thought I should share my South Asian food recipes and western food recipes with all of you. From quick and easy weekday dinners to indulgent weekend treats, this category offers something for every palate and occasion. Whether you’re a seasoned chef or a novice in the kitchen, these recipes are designed to inspire and delight, making cooking at home an enjoyable and rewarding experience. Get ready to tantalize your taste buds and impress your loved ones with delicious dishes made with love from your own home kitchen.

Sweet Hut Bakery and Cafe front view

Sweet Hut Bakery & Cafe: Birthday Cake Custom Lawrenceville GA

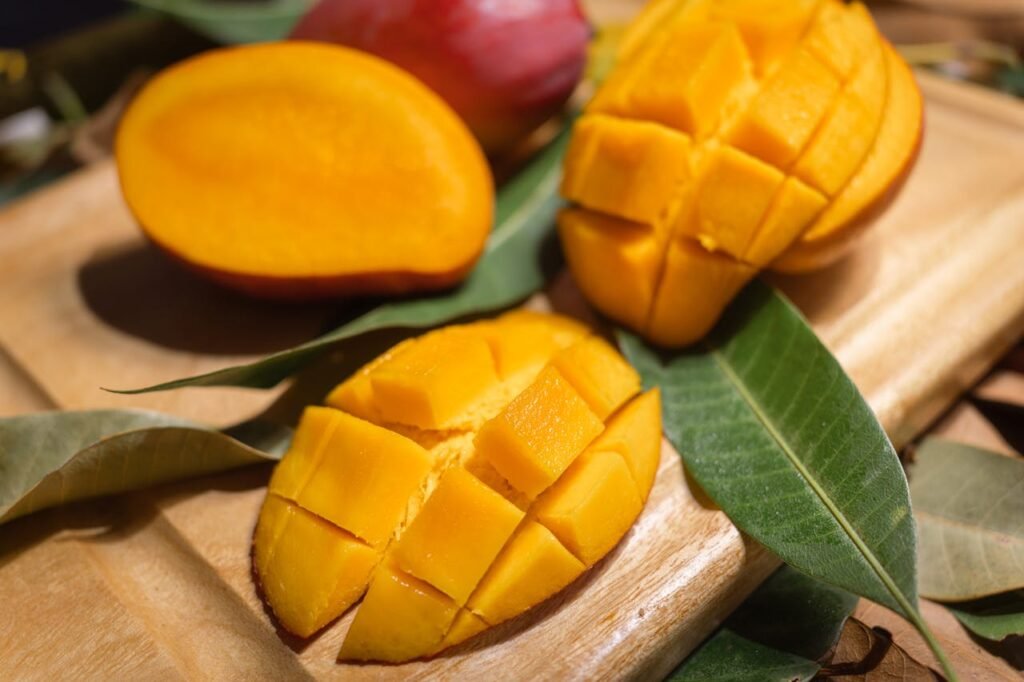
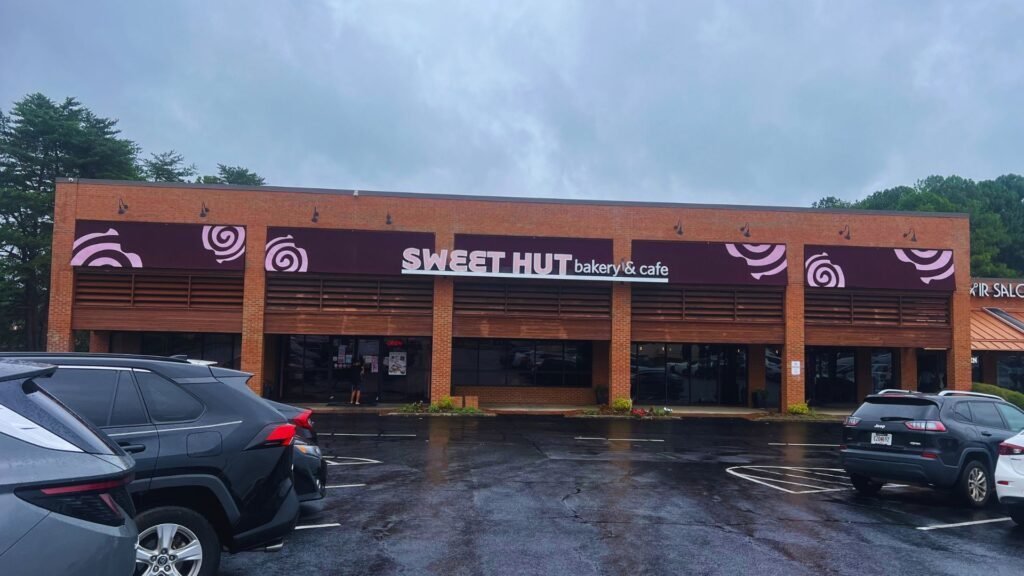
Last week, I was looking for a sweet bakery close to my house. I spoke with a few of my friends and neighbors to identify the greatest bakery for sweets. Numerous them recommended Sweet Hut Bakery and Cafe to me. So, I went Sweet Hut Bakery last weekend and tasted their cakes and sweets. All of the sweet’s items were really delicious. Sweet Hut menu offers a wide range of options. You can find freshly baked pastries to gorgeous cakes, deserts all made with lots of care. Today, I will share my experience at Sweet Hut Bakery with all of you. Let’s check out what Sweet Hut has for you. Sweet Hut Bakery & Cafe: Your Go-To Spot for Birthday Cake Treats Introduction Sweet Hut Bakery & Cafe is a perfect place for people who love sweets and tasty baked goods. This lovely cafe has many treats and drinks. It’s a great spot to satisfy your cravings anytime. Whether you want a classic pastry, a rich cake, or a cool boba tea, Sweet Hut has something for each person. In this article I will include Sweet Hut menu, prices, facilities inside the store and many other things. Let’s explore Sweet Hut locations, menu and prices for making memorable your next visit. Sweet Hut Location As, I am living near to Duluth, Georgia. So, I choose to go there. But Sweet Hut has multiple locations available in Atlanta, Georgia. Let’s check out those locations. Doraville, Georgia Location: 5150 Buford HWY, Suite A-100, Doraville, GA 30340 Open Hours: Open every day- hours 9 am to 10 pm Phone Number: (470) 545.2585 or doraville@sweethut.com For more information, please visit to Sweet Hut website. Midtown, Georgia Location: 935 Peachtree ST NE, Suite 935, Atlanta, GA 30309 Phone Number: (404) 600.4800 or midtown@sweethut.com Open Hours: Monday to Thursday hours- 11 am to 10 pm. Friday to Sunday- 11 am to 11 pm. Duluth, Georgia Location: 2180 Pleasant Hill Blvd, Suite 18, Duluth, GA 30096 Phone Number: (470) 545.0762 or duluth@sweethut.com Open Hours: open all 7 days- 10 am to 10 pm Lenox, Georgia Location: 3393 Peachtree Rd Suite 1006, Atlanta, GA, 30326 Phone Number: (404) 343-0309 or lenox@sweethut.com Open Hours: Monday to Saturday hours- 10 am to 7.30 pm. Sunday- 12 am to 7 pm. Marietta, Georgia Location: 2795 Chastain Meadow PKWY, Suite 900, Marietta, GA 30066 Phone Number: (770) 795-8082 or marietta@sweethut.com Open Hours: open all 7 days- 9 am to 9 pm Outside Georgia, they have one location near to Texas. Plano, Texas Location: 2001 Coit Rd, Suite 301, Plano, TX, 75075 Phone Number: (972) 905-5533 or plano@sweethut.com Open Hours: open all 7 days- 9 am to 12 pm Read more- If you like to know more about how to cook Chicken Biryani at home, you can read our article- “How to Make Chicken Biryani at Home: Step By Step Guide” Sweet Hut Bakery Facilities Sweet Hut offers dining options. 40 to 50 people can sit there at once. In the dining area, there are two and four-seat tables. If you have more family members, you need to talk with them for dinning services. Furthermore, there is outdoor dining available. In addition, Sweet Hut has separate restrooms for men and women. Those toilets are constantly kept clean. Exploring the Sweet Treats Menu Sweet Hut Bakery & Cafe is a fantastic place filled with tasty treats. The menu offers a wide range of options. Lot of different cakes, pastries, deserts are available at Sweet Hut Bakery. But there’s even more! Sweet Hut Bakery & Cafe also has a great choice of drinks to go along with your sweets. You can choose from classic coffee and tea or try something fruity like refreshers or creamy smoothies. You will find the perfect drink to enjoy with your treat. For getting more information about Sweet Hut Bakery and Cafe menu, you can look to their website. Sweet Hut has many pastries that will make you feel like you have so many options. Their display case looks amazing and is full of tasty treats. Here are some favorites to make your mouth water: Burgers Sweet Hut bakery has different flavors of burgers. But Sweet Hut burger is more popular to customers. The cost is $12.25. They also have burgers with chess and tofu for $11.50 and $11.25, respectively. Chicken Wings Sweet Hut sells different flavors of chicken wings- such as Salt and pepper chicken wings- $8.50 Honey butter chicken wings- $8.95 Spicy sweet and sour chicken wings- $8.95 Lite Snack Sweet Hut sells lite snack all throughout the day. Mostly, fried fish balls are popular to customers. The cost is $5.50 for 8 fish balls. Also, they make samosa, spring rolls, fried fish cakes, bacon cheese fries, firecracker shrimp. Usually, all of those items are very cheap at Sweet Hut Bakery. You have to spend $4.50 to $6.00 for eating those delicious items. Cake Different kinds of cakes are available at Sweet Hut Bakery and Cafe. Here, I will mention and briefly describe most popular cakes- Mango Mousse- The mango is the star of this cake. Mangos are used to build the top layer. Second layer is mango whipped cream. They utilize fresh mango once more for the third layer, which covers the mango whipped cream. The bottom layer is made of spongy vanilla cake. Chocolate Mousse- This cake made with chocolate ganache glaze, chocolate mousse, chocolate lace and chocolate sponge cake. Midnight Lady- This one is best for the couple. It made with walnuts crust, chocolate glaze, chocolate buttercream and mixture of all of those items. This taste is amazing. We saw many young couples are very much interested in buying this special cake. Mocha Walnut Cake- This cake made with vanilla whipped cream, chocolate syrup, walnuts and mocha whipped cream and mocha sponge cake. Strawberry Cake- This is one of the popular cakes in this store to the customers. It made by fresh fruits, strawberry and vanilla whipped cream, vanilla sponge cake, fresh strawberries with

Sweet Hut Bakery & Cafe: Birthday Cake Custom Lawrenceville GA Read More »

pexels-photo-7194889-7194889.jpg

Easy Steps: How to Cut a Pineapple Easily

Cutting a pineapple may seem challenging, but with the easiest way to cut a pineapple, you can enjoy this tropical fruit effortlessly. If you’re wondering how to cut a pineapple with a knife, a few simple techniques can help you remove the tough skin and core with ease. Whether you want rings, chunks, or slices, learning how to cut a pineapple at home will make the process quick and mess-free. Follow these steps to prepare fresh pineapple like a pro. Beginner’s Guide: How to Cut a Pineapple with a knife in 5 Easy Steps Pineapple means summer! Nothing says summer like a fresh pineapple. This fruit from the tropics is delicious and quite handy in the kitchen. You can work it into savory dishes, chilled beverages and sweet desserts. It can be enjoyed many ways. But many people do not buy a whole pineapple because they don’t know the easiest way how to cut a pineapple at home. You don’t have to worry! In this article, we will analyze how to cut a pineapple with a knife easily. You will impress your friends and family! “This article contains affiliate links. I might get commissions from those links if you click through the link and finalize a purchase. Please read Disclosure section for more information.” Key Highlights History of Pineapple The pineapple is believed to have originated about 3,000 years ago in the Amazon rainforest. By the 1550’s, pineapples were shipped routinely from the Caribbean to Europe. American Christmas in the 19th century would pave the way for the pineapple to take on its current symbolism. Now a days, pineapple is one of the best fruits in the world. Doctor also suggests that pineapple has impressive health benefits for all ages of people. How to Cut a Pineapple with a Knife: Selecting the Perfect Pineapple The first step to slicing a pineapple the right way is picking a good one. Pineapples do not ripen after being picked. That makes choosing a ripe pineapple at the supermarket highly important. Choose pineapples that are bright, golden yellow, particularly on the bottom. This color indicates that the fruit is sweet and ripe. Avoid pineapples that are mostly green, as they probably aren’t ripe. Signs of Ripeness Color is a big clue when choosing a ripe pineapple, but it’s not the only one. While a ripe pineapple will appear golden yellow, you need to look for other signs as well. Gently press the pineapple. It should give a little when you push it. This means it’s juicy. Stay away from pineapples that are very hard or have soft spots. These might be too ripe. And use your sense of smell, too! A ripe pineapple should smell sweet and fruity, particularly at the bottom end. Smell it before you buy pineapple. Importance of Pineapple Size and Shape And consider its size and shape when you go to the grocery store to buy a whole pineapple. A large pineapple may be appealing but consider how much you will actually use before it goes bad. Choose a pineapple that feels heavy for its size. This often means it is juicy. Also, check the shape. Pick a pineapple that is symmetrical and has no big bruises or marks. In the end, a good pineapple is one that fits your needs. Choose a size that is easy for you to handle and a shape that you find attractive. Preparing Your Workspace and Tools on How to Cut a Pineapple at Home Before you cut your pineapple, let’s get your workspace ready. This will help you stay safe and make things easier. First, gather your main tools: a sharp chef’s knife, a paring knife, and a sturdy cutting board. Keeping your workspace clean and neat will help you concentrate on cutting and avoid any accidents. Now, let’s go to the step-by-step guide for easiest way to cut a pineapple. Essential Cutting Equipment For Easiest Way to Cut a Pineapple Let’s dig in how to cut a pineapple with a knife. A sharp knife is important for safely cutting a pineapple. It helps you cut through the tough skin and core easily. If your knife is dull, it can slip and may cause injury. Always use a cutting board to keep your countertop safe and stable while you cut. Along with a chef’s knife for the first cuts, a paring knife is great for getting rid of any spots or blemishes. It’s also good for trimming the core. A smaller and sharper paring knife gives you better control. Having these cutting tools close will make cutting a pineapple easier and much more fun. Safety Tips Before You Start When you grip the pineapple, remember to make a claw out of your hand. This gives you a good, controlled grip where your fingers are safely away from the blade. If you’re new to a small paring knife or want to work on knife skills, start with basic cutting. These simple things will make you feel more control and confident. Always be sure to cut away from your body to minimize the risk of getting hurt. By using these simple safety tips, you can cook more safely and enjoyably. Read more- Step by Step How to Cut a Mango Step-by-Step Guide to Cutting a Pineapple With a Knife And now for the fun part — cutting the pineapple! No need to panic, it’s simple if you follow the appropriate procedures. Follow these easy steps, and before you know it, fresh ripe pineapple will be yours! Remember that practice goes a long way. It will get faster and easier the more pineapples you cut. So, let’s begin! Step 1: Slice Off the Top and Bottom Lay the pineapple on its side on your cutting board. Using a serrated knife, cut off the top of the pineapple. Make the cut about a half inch below the leaves. This will give you a flat surface. Then, turn the pineapple over and cut off the bottom end. Remove this part to create another flat and steady base. Make sure to cut just enough to remove the brown, woody part but do not waste too much of the fruit. By cutting

Easy Steps: How to Cut a Pineapple Easily Read More »

Cutting 2 mangos in a chopping broad

How to Cut a Mango: Expert Guide About Mango Cutting Tricks

Cutting a mango doesn’t have to be difficult if you know how to cut a mango with a knife. Whether you prefer bite-sized pieces or elegant slices, the right technique makes all the difference. In this guide, we’ll show you how to cut a mango into cubes for easy snacking and how to cut a mango into slices for serving. mango cutting tricks: how to cut a mango into cubes and how to cut a mango into slices A ripe mango is a tasty treat. However, cutting it can be tricky if you don’t know how to do it. This simple guide will help you learn how to cut a mango with a knife like a pro! Use a sharp knife and a strong cutting board. You will see how to safely cut around the pit of the mango to reach the sweet fruit inside. Get ready to enjoy this tropical fruit in all its goodness! “This article contains affiliate links. I might get commissions from those links if you click through the link and finalize a purchase. Please read Disclosure section for more information.” Key Highlights History of Mango The mango, or Mangifera indica, is native to South Asia, and specifically India and Myanmar. They have a history that spans over four thousand years, being one of the oldest cultivated fruits worldwide. In many countries, the fruit is a symbol of love, fertility, and even immortality; its cultural significance is pronounced. Through trade routes and exploration, mangoes were spread to various parts of the world. In the sixteenth century Portuguese explorers helped to extend the cultivation of mango to Africa and South America. Eventually, mangoes made their way to North America and Australia. Today mangoes are harvested in many tropical and subtropical areas around the world. Depending on its variety, they are all sorts of different shapes, sizes, and colors. Different types of mango flavors are available. Mango is a popular fruit due to its sweet, juicy flesh, eaten fresh or blended into smoothies, salads, desserts, chutneys and even used as flavoring in beverages. Apart from being a treat to the tongue, mango is known for their rich nutritional profile packed with vitamins A, C and dietary fiber. Understanding Mangos They are a well-liked tropical fruit with sugary and juicy pulp. Originating in South Asia, there are many varieties, which differ in flavor, color and odor. You can find popular types like Tommy Atkins and smaller types like Ataulfo. Mangos add a colorful and flavorful element to a wide variety of dishes. Understanding the different types of mangos, and how to identify them when they are ripe, will help make your cooking even better. Identifying Different Types of Mangos When you go into a grocery store, you might see many types of mangos. Each type looks different. There are many varieties of mangos, but only a few are available in stores outside their growing regions. The Tommy Atkins mango is easy to spot. Its skin has a red blush, it’s firm and its flavor is mild. In contrast, the Ataulfo mango, or Honey mango, is plumper and golden-yellow. Other popular kinds are the Kent mango, praised for its sweet and fragrant taste, and the Keitt mango, which features bright green skin and a sweet, silky texture. Whichever one you do try; a ripe mango is always a treat. How to Tell if a Mango is Ripe and Ready to Cut Selecting a perfectly ripe mango is essential for an enjoyable experience. Unlike with some other fruits, the color probably won’t tell you if a mango is ripe. Some ripe mangos may be green, while others can appear red. To know if a mango is ripe, you can feel it. Gently squeeze the mango. A ripe mango, like a ripe avocado or peach, will yield a bit when you press it. Avoid mangos that seem extremely hard; they’re not ripe yet, and don’t buy any that feel too soft, as they’re presumably overripe. If you purchase a mango that is not fully ripe, you can aid it in ripening quicker. All you have to do is put the mango in a paper bag at room temperature for a couple of days. Preparing to Cut a Mango with A Knife Before talk about how to cut a mango into cubes or how to cut a mango into slices, make sure you have the proper tools. It’s also good to know tips for safety. Cutting a mango isn’t too difficult, but with the right preparation, you can make it a whole lot easier and safer. With careful preparation and the correct equipment, this task can be a fun activity. Let me show you what you need for an easy, successful mango cutting experience. Read more- Beginners Mastering How to Cut Pineapple Necessary Tools and Equipment for Cutting a Mango Having the right tools is important before learn how to cut a mango into slices. A sharp knife helps you make clean cuts. A small paring knife is good for working around the pit and small areas. A solid cutting board gives you a safe and steady place to work. It keeps your countertops safe and stops the mango from slipping while you cut. Also, if you want to peel the skin off before cutting, a vegetable peeler can be helpful. Safety Tips Before You Begin Digging How to Cut a Mango with a Knife Working with a sharp knife needs careful attention. Before you start cutting, make sure your cutting board is steady and will not move. You can place a damp paper towel or a non-slip mat under it for better grip. When you use a sharp knife or a paring knife, always cut away from your body. Keep your fingers away from the blade. Remember to curl your fingers into a “claw” grip. This will help guide the knife and keep your fingertips safe. After you finish cutting, wash your knife and cutting board right away. This helps stop bacteria from sticking around and keeps your kitchen clean and safe. That’s the basic rule how to cut a mango with a knife. Step-by-Step Guide to Cutting a Mango into Cubes

How to Cut a Mango: Expert Guide About Mango Cutting Tricks Read More »

Cut watermelon into 2 pieces

How to Cut a Watermelon – Easy Way Cutting Tips

Cutting a watermelon doesn’t have to be difficult if you know the easiest way to cut a watermelon. Whether you prefer bite-sized cubes for easy snacking or classic triangles for serving, the right cutting technique makes all the difference. In this guide, we’ll show you how to cut a watermelon into cubes for convenience and how to cut a watermelon into triangles for a perfect handheld treat. Let’s make slicing effortless and mess-free! Beginner’s Guide: easiest way to cut a watermelon Summertime is a chance to enjoy cool snacks, and what is better than a juicy, ripe watermelon? Cutting a whole watermelon may look tough, but this simple guide shows you easiest way to cut a watermelon into bite-sized pieces. With a sturdy cutting board and some tips, you will feel confident enjoying this summer favorite in no time. “This article contains affiliate links. I might get commissions from those links if you click through the link and finalize a purchase. Please read Disclosure section for more information.” History of Watermelon Watermelon, scientifically known as Citrullus lanatus, has a rich and fascinating history that dates back thousands of years. Believed to have originated in the Kalahari Desert of Africa, watermelons were initially cultivated for their water content and ability to thrive in arid conditions. Ancient Egyptians are known to have cultivated watermelons as early as 2,000 BC, with evidence of the fruit found in hieroglyphics and burial tombs. The popularity of watermelons spread throughout the Mediterranean region and eventually reached Europe and other parts of the world through trade routes. In the 10th century, watermelons were introduced to China, where different varieties were developed to suit local tastes. Watermelons made their way to North America with European colonists in the 16th century and became a staple crop in Southern states due to their high water content and tolerance for hot climates. Today, watermelons are grown on every continent except Antarctica and are enjoyed around the world for their refreshing taste and nutritional benefits. In addition to being a delicious summer treat, watermelons are also packed with essential nutrients such as vitamins A and C, antioxidants like lycopene, and amino acids like citrulline. This juicy fruit continues to be a symbol of summertime refreshment and is celebrated in various cultures through festivals, recipes, and traditions. How to Cut a Watermelon into Cubes: Selecting the Perfect Watermelon Finding a good watermelon in grocery stores can be tough. But, you can use some easy tips to help you pick the right one. First, listen carefully! Tap the watermelon gently. If it makes a hollow sound, that means it is ripe. Next, check for a creamy yellow field spot. This shows that it ripened well on the vine. Stay away from any watermelons that have soft spots or bruises. A good watermelon will feel heavy for its size, which means it is juicy and sweet inside. Signs of Ripeness Knowing how to spot a ripe watermelon can make your summer snacks much better. Tapping a watermelon can create a satisfying hollow sound. But there are also visual clues to look for that show the melon is ripe and ready to eat. Focus on the field spot, which is the part where the watermelon sat on the ground while it grew. A ripe watermelon has a creamy yellow or buttery orange field spot. Try to avoid any watermelons with white or pale green spots, as these may not be ripe enough. Also, a slightly dull rind means the watermelon had enough time to ripen in the sun. The rind of a ripe watermelon should feel firm. You should not find any soft spots. By using these simple tips, you can pick a juicy and tasty watermelon for snacking. Avoiding Common Pitfalls When picking the best watermelon, avoid mistakes that can ruin your taste experience. First, don’t choose one with a very green rind. While the outside should mostly be green, if it looks too dark or bright green, it may not be ripe enough. Instead, look for watermelons with a slightly dull green rind that may have some yellow spots. This usually means it is ripe and ready to eat. Next, check the stem end of the uncut watermelon. The stem should be dry and brown, showing the melon ripened well on the vine. Finally, stay away from watermelons that have soft spots, bruises, or cracks on the rind. These flaws can change how the melon tastes and feels. Read more- How to Cut Onion like a Pro How to Cut a Watermelon into Triangles: Preparing Your Workstation Before you start cutting, make sure your workspace is safe and clean. First, choose a large cutting board that is big enough for your watermelon. This helps keep things stable and reduces mess. It’s also good to have a damp paper towel or cloth close by. You can use it to wipe any spills or sticky spots from the watermelon juice. A clean kitchen towel will be useful too. You can dry the watermelon after washing it and wipe your hands as you go. Necessary Tools and Equipment Before you start cutting your watermelon, get the right tools for a smooth and fun experience. First, make sure you have a large cutting board. This gives you plenty of space to cut and helps keep any juice from spilling. Next, you need a sharp knife. A sharp chef’s knife can slice through the watermelon rind and flesh easily. It makes clean cuts and lowers the chance of slipping, so it’s safer and faster. Finally, have some plastic wrap ready. You can use it to store any leftover watermelon. Plastic wrap keeps the fruit fresh and stops it from soaking up other smells in your fridge. Safety Tips for How to Cut a Watermelon While cutting a watermelon is easy, safety comes first. Start by putting your cutting board on a flat surface. This helps stop it from wobbling or slipping while you cut. Make sure to use

How to Cut a Watermelon – Easy Way Cutting Tips Read More »

Onion slice with knife and keep in a plate

Perfect Your Skills: How to Cut an Onion Guide

Knowing how to cut an onion the right way can save time and effort in the kitchen. If you love crispy onion rings, we’ll show you how to cut an onion into rings with ease. Tired of watery eyes? Don’t worry—we have tricks on how to cut an onion without crying. And for those who need perfectly even pieces, we’ll also cover how to cut an onion into slices or how to cut an onion into rings effortlessly. Get ready to chop onions like a chef! Beginner’s Guide: How to Cut an Onion into slices Perfectly Learning to cut an onion well is an important cooking skill. It can make your dishes taste much better. Whether you are new to cooking or want to improve your skills, this guide will help you. You will gain the knowledge and confidence to handle any recipe that uses onions. To cut onions safely and easily, you need a sharp knife and a strong cutting board. We will look at basic techniques like dicing onions for caramelized onions and some more advanced methods. Let’s discover how to cut an onion perfectly. “This article contains affiliate links. I might get commissions from those links if you click through the link and finalize a purchase. Please read Disclosure section for more information.” Understanding Onions: Varieties and Uses Onions are a common ingredient used in kitchens all over the world. They belong to the onion family and come in many flavors, colors, and sizes. Each type of onion adds its own taste and texture to a dish. This makes it very important to pick the right onion for your recipe. White onions have a strong, sharp flavor. They are great for making savory sauces and soups. On the other hand, Vidalia onions have a mild sweetness. They are often eaten raw in salads. Knowing the differences between these types of onions can really change how well your dish turns out. Types of Onions and Their Flavors Selecting the Right Onion for Your Recipe While some recipes need certain types of onions, knowing basic tips can help when you need to switch them out. For dishes that want a milder onion taste, like salad dressings or smooth sauces, white or sweet onions are the best way to go. Yellow onions are good for many different dishes. You can use them in soups and stews, or even caramelize them for toppings on burgers. They also work well for making onion rings if you slice them thick. If a recipe needs a lot of chopped onion, using a large Spanish onion can be timesaving. You can cut it in half and keep the other half for another time. Preparing How to Cut an Onion Without Crying Before you begin chopping, it’s important to gather the right tools and prepare your onion well. This can really help with safety and make your work easier. A bit of setup can lead to a better experience when you cut onions. Essential Tools and Equipment For How to Cut an Onion into Slices Proper Onion Storage Techniques Proper storage is very important for keeping your onions fresh and tasty. Whole onions should be kept in a cool, dry place with good air circulation. Keep them out of direct sunlight. Once you cut an onion, put it in an airtight container or wrap it tightly with plastic wrap. This helps stop it from drying out or taking on other smells in the refrigerator. To reduce odor from the onion, you can put it in the crisper drawer of the refrigerator. This drawer helps keep the right humidity. When you store a cut onion, make sure the cut side is facing down. This will help it stay fresh longer. Read more- How to Cut Watermelon: Beginner’s Guide The Beginner’s Guide How to Cut an Onion into Slices Now that you are ready, it is time to learn how to cut an onion. This simple guide will help you slice it evenly and make it easier to reduce tears. Make sure to keep your fingers safe and away from the knife while you cut. If you follow these easy steps, you can handle any onion recipe. Whether you are making a big stew or a light sauce, you will be ready. So, take your cutting board, sharpen your knife, and let’s start chopping. Step 1: Trim the Ends Place your onion on the cutting board. Use a sharp knife to cut off the stem end. Remove about half an inch from that end. Next, turn the onion around. Cut off the root end, also removing about half an inch. Removing both ends gives you a stable base for cutting. It also makes peeling the onion skin much easier. Be careful not to cut too deep into the root end. If you do, the onion could fall apart. Keep a bit of the root end intact. This will help hold the onion layers together while you slice. Now that you have trimmed the ends, you are ready for the next step. Step 2: How to Cut an Onion into Slices: Cut in Half and Peel Place the onion on one of its flat sides. This gives you stability while cutting. Carefully cut the onion in half lengthwise. Start from the stem end and cut through to the root end. Now, peel off the onion skin. It should come off easily, especially if you’ve trimmed the ends right. If some skin is still on, remove it gently with your fingers or the tip of your knife. Once you have peeled the onion, throw away the skin. Put the onion halves cut side down on your cutting board. You are now ready to slice or dice! Step 3: How to Cut an Onion into Slices Hold one half of the onion tightly with your non-dominant hand. Curl your fingers inward to stay safe. Place your knife straight up and down on the cutting board. Start making thin slices from

Perfect Your Skills: How to Cut an Onion Guide Read More »

Making Chicken kormas at pot

How to Make Chicken Korma Curry: Step by Step

If you love rich and creamy curries, learning how to make chicken korma is a must! This dish is packed with flavors from aromatic chicken korma ingredients like yogurt, nuts, and fragrant spices. Our korma chicken recipe is easy to follow, ensuring you get tender chicken in a luscious, flavorful sauce. Whether you’re cooking for a special occasion or a comforting meal, this guide will help you how to make chicken korma curry at home. Get ready to enjoy a restaurant-quality dish right from your kitchen! How to Make Chicken Korma Curry: Beginners Guide Among Indian cooking chicken Korma is everyone’s favorite dish. Chicken korma is rich and creamy with a great spice blend. It features juicy chicken in a rich gravy. Also, you need to add garam masala, yogurt, nuts and occasionally a spoonful of coconut milk. This article is a step-by-step guide about how to make Chicken Korma curry for both expert chefs and beginners cooking for the first time. “This article contains affiliate links. I might get commissions from those links if you click through the link and finalize a purchase. Please read Disclosure section for more information.” Understanding How to Make Chicken Korma Curry Chicken Korma is a unique dish in the wide range of Indian curries. It has a mild flavor and a smooth texture. Unlike othercurries that can be very spicy, Chicken Korma combines fragrant spices with a creamy sauce. This makes it both cozy and fancy. Even though it has a rich taste, Chicken Korma is easy to make for anyone. The ingredients are easy to find, and the cooking steps are clear. This makes it a great option for weeknight meals or special events. The History and Origin of Chicken Korma Chicken Korma’s history goes back to the Mughal era in India, around the 16th century. This dish likely started in the royal kitchens of the Mughal emperors. They were famous for their grand feasts and rich meals. This tasty and creamy curry was usually served during special events and for important guests. It showed off the luxury and greatness of the Mughal court. The word “korma” is derived from the Urdu word “korma,” meaning “to braise.” This is how the dish was prepared. Chicken Korma is still very famous in India also loved across the world. It’s an increasingly common presence on the menus of many Indian restaurants and curry houses. Its enduring popularity lies in its precise balance of flavors and textures, which is a hallmark of all of Indian food. Why Chicken Korma is a Beloved Dish in Indian Cuisine Chicken Korma is a favorite dish in Indian food. People love it for its rich flavor and creamy texture. This great taste comes from a mix of special spices and rich ingredients. Garam masala is one important spice in Indian recipes. It adds warmth and depth. The yogurt and nuts used in the dish also make a smooth and tasty sauce. One reason Chicken Korma is so popular is because it can be changed to fit personal tastes and diets. You can change how spicy it is. There are also vegetarian options, where you can use vegetables or paneer instead of chicken. These are just as tasty. Whether it’s for a family dinner or a special event, Chicken Korma is a must-have. It stays a beloved choice in Indian cooking traditions. Preparing How to Make Chicken Korma Curry Before you start cooking Chicken Korma, it’s important to gather the right ingredients and tools. This will make cooking easier and let you enjoy making this tasty Indian dish. You need key spices and the right kind of chicken for the best results. Having everything ready helps your cooking experience be fun and satisfying. Now, let’s look at what you need for a truly authentic and delicious Chicken Korma. Essential Ingredients for Authentic Korma Chicken Recipe Chicken Korma is a flavorful and aromatic dish that requires a blend of various spices and ingredients to achieve its rich taste. To make Chicken Korma, you will need the following chicken korma ingredients along with their respective amounts: These ingredients come together to create a creamy and indulgent Chicken Korma that is sure to delight your taste buds with its complex flavors and tender chicken pieces in a luscious sauce. As I always say, the key to a delicious Chicken Korma is in selecting the right ingredients. The mix of ingredients, of course, will vary based on location and tastes, but some main ones will always be in the mix. Garam masala, a blend of ground spices, provides the overpowering aroma and flavor of the korma. Ground almonds are key, as well: They thicken the curry and give it a nutty flavor. Whole spices, such as cardamom pods, sticks of cinnamon and cloves, give the dish warmth and subtlety. Apart from these core ingredients, yogurt, cream or coconut milk, onions, ginger, garlic, and green chilies do their magic in giving Chicken Korma a such creamy texture and a balanced flavor. Selecting the Right Type of Chicken The chicken you choose can alter the direction of your Chicken Korma. Bone-in chicken thighs provide more flavor, while boneless chicken breast cooks quicker and is leaner. This recipe works best with boneless chicken, such as breast or thigh meat, that’s been cooked in olive oil. It cooks quickly and absorbs the flavors of the korma sauce nicely. If using chicken breast, dice into small cubes. That allows it to cook through evenly and soak up the creamy korma sauce. Bone-in chunks of chicken are delicious, but they require longer cooking time to be fully cooked. Ultimately, your decision depends on your preferences and the amount of time on your hands. But regardless of what kind you use, some good, fresh chicken will definitely make your chicken curry taste so much better. Kitchen Tools and Equipment Needed for How to Make Chicken Korma Curry You don’t need a swanky kitchen to make delicious Chicken Korma. But the right tools can help make it easier and more enjoyable. You do not need a food processor, but it makes a huge difference. It can assist in getting a

How to Make Chicken Korma Curry: Step by Step Read More »

Chicken Biriyani at plate with potatoes, rice and chicken

How to Make Chicken Biryani at Home: Step By Step Guide

Craving a delicious homemade meal? Our chicken biryani recipe is packed with aromatic spices, tender chicken, and perfectly cooked basmati rice. If you’re looking for a simple chicken biryani recipe, this step-by-step guide will help you recreate the authentic taste effortlessly. Follow along and discover how to make chicken biryani at home that’s rich, fragrant, and absolutely irresistible! Master the Art: How to Make Chicken Biryani at Home Indian food can never be the fulfill if chicken biryani is not added to its list. It is easier to prepare than many think. This guide will equip you with all the information to make a good Hyderabadi biryani recipe at home. You need to review its past, simple step-by-step directions, and useful tips. Let’s explore our article how to make chicken biryani at home step by step. “This article contains affiliate links. I might get commissions from those links if you click through the link and finalize a purchase. Please read Disclosure section for more information.” Understanding How to Make Chicken Biryani at Home: A Culinary Journey Biryani is not just a meal; it’s a blend of many tastes, textures, and smells. Every part of biryani matters. The fluffy basmati rice, the soft marinated meat, and the mix of spices all work together. But biryani is more than its rich taste. It also has a deep history and meaning that makes it special. Biryani started many years ago. It crossed many borders and changed into many different styles, each with its own unique touch. This rich history keeps attracting food lovers everywhere, making biryani a true work of culinary art. The Origins of Biryani Biryani’s exact start is hard to pin down, but many food experts think it began in Persia or Central Asia. Then, it likely made its way to India. Some say Mughal invaders brought it in the 16th century. Others believe Persian traders introduced it before that time. No matter where it started, biryani quickly became popular in India. It changed from a dish for kings to a favorite for all kinds of people. Its ability to mix in local flavors led to the many different styles we enjoy today. The key components of biryani — aromatic rice, tender meat, a blend of whole spices and herbs — have not changed that much over time. All these spices are beautifully blended with fried onion and fresh herbs such as mint leaves to give a unique taste. This has astonished eaters for decades. Types of Biryani: From Hyderabadi to Kolkata Hyderabadi biryani is famous for its strong flavors and spicy taste. It is very popular in Southern India. It is a biryani with meat that has been marinated in yogurt, saffron rice and generous amounts of whole spices. These add richness and fragrance to the dish. Get Kolkata biryani if you visit the north. If you go to the north, you will find Kolkata biryani. This type is known for its light sweetness and often has potatoes and boiled eggs. It uses fewer tomatoes and red chilies than the southern types. This makes it milder, which many people in the east enjoy. With some searching, you can find various kinds of tasty biryani in Indian stores in the United States. Whatever its kind, biryani is a flavored dish that takes your palate on a journey. Essential Ingredients for How to Make Chicken Biryani at Home Let’s dig in how to make chicken biryani at home. Making a real chicken biryani starts with picking the right ingredients. You need fresh and good quality spices. These spices are very important for this dish. Simple Chicken Biryani Recipe Ingredients Biryani Masala Powder adds flavor to the ideal biryani. This is a list of spices you can use and amounts to create your own homemade Biryani Masala Powder: Key Spices for the Authentic Flavor The fragrant smell and flavor of biryani comes from a combination of spices. Garam masala is the main Indian spice blend that provides the base. Look for premade mixes or make your own with a recipe for a personalized experience. Biryani masala, specifically prepared for this, enhances not only taste but also aroma. If you can’t find it, you can substitute garam masala powder instead for similar results. Red chili powder gives it some spice, so adjust your quantity depending on how spicy hot you go. Turmeric powder adds a warm flavor and gives the rice a bright yellow color, making it look nice. To get stronger flavors, lightly roast whole spices before grinding them. This way, you bring out their great smell and taste even more. The rice and chicken you choose are also key. Use aged basmati rice for a fluffy texture. Select tender and tasty cuts of chicken for the best results. By choosing quality ingredients, you’re getting ready for a biryani that is full of flavor. Choosing the Right Rice and Chicken Choosing the right rice for your biryani is very important. Aged basmati rice is the best choice. It has long grains, a nice smell, and cooks up fluffy. This makes it perfect for biryani. Chicken thighs are great for biryani, but chicken breasts are leaner. Bone-in chicken thighs remain juicy and tender while cooking. They also add great flavor to the rice. You should get chicken thighs from your local butcher. It is best to choose free-range or organic chicken when you can. Good ingredients make a big difference in your biryani. Read more- How to cook chicken korma at home Preparing Your Kitchen for Simple Chicken Biryani Recipe Setting up your kitchen is an integral part of preparing biryani. Getting the right tools and keeping things neat helps with an easy rhythm for cooking. When you gather everything, you need ahead of time, you can pay attention to each step. This makes the whole experience more fun. Must-Have Cooking Equipment A large pot or Dutch oven is very important for making biryani. It gives enough space to layer and cook the ingredients just right. A heavy-bottomed pot helps heat spread evenly. This stops food from sticking and makes sure everything cooks well. Most people make biryani

How to Make Chicken Biryani at Home: Step By Step Guide Read More »