

Craving a delicious homemade meal? Our chicken biryani recipe is packed with aromatic spices, tender chicken, and perfectly cooked basmati rice. If you’re looking for a simple chicken biryani recipe, this step-by-step guide will help you recreate the authentic taste effortlessly. Follow along and discover how to make chicken biryani at home that’s rich, fragrant, and absolutely irresistible!
Master the Art: How to Make Chicken Biryani at Home
Indian food can never be the fulfill if chicken biryani is not added to its list. It is easier to prepare than many think. This guide will equip you with all the information to make a good Hyderabadi biryani recipe at home. You need to review its past, simple step-by-step directions, and useful tips. Let’s explore our article how to make chicken biryani at home step by step.
“This article contains affiliate links. I might get commissions from those links if you click through the link and finalize a purchase. Please read Disclosure section for more information.”
Understanding How to Make Chicken Biryani at Home: A Culinary Journey

Biryani is not just a meal; it’s a blend of many tastes, textures, and smells. Every part of biryani matters. The fluffy basmati rice, the soft marinated meat, and the mix of spices all work together. But biryani is more than its rich taste. It also has a deep history and meaning that makes it special.
Biryani started many years ago. It crossed many borders and changed into many different styles, each with its own unique touch. This rich history keeps attracting food lovers everywhere, making biryani a true work of culinary art.
The Origins of Biryani
Biryani’s exact start is hard to pin down, but many food experts think it began in Persia or Central Asia. Then, it likely made its way to India. Some say Mughal invaders brought it in the 16th century. Others believe Persian traders introduced it before that time.
No matter where it started, biryani quickly became popular in India. It changed from a dish for kings to a favorite for all kinds of people. Its ability to mix in local flavors led to the many different styles we enjoy today.
The key components of biryani — aromatic rice, tender meat, a blend of whole spices and herbs — have not changed that much over time. All these spices are beautifully blended with fried onion and fresh herbs such as mint leaves to give a unique taste. This has astonished eaters for decades.
Types of Biryani: From Hyderabadi to Kolkata
Hyderabadi biryani is famous for its strong flavors and spicy taste. It is very popular in Southern India. It is a biryani with meat that has been marinated in yogurt, saffron rice and generous amounts of whole spices. These add richness and fragrance to the dish. Get Kolkata biryani if you visit the north.
If you go to the north, you will find Kolkata biryani. This type is known for its light sweetness and often has potatoes and boiled eggs. It uses fewer tomatoes and red chilies than the southern types. This makes it milder, which many people in the east enjoy.
With some searching, you can find various kinds of tasty biryani in Indian stores in the United States. Whatever its kind, biryani is a flavored dish that takes your palate on a journey.
Essential Ingredients for How to Make Chicken Biryani at Home
Let’s dig in how to make chicken biryani at home. Making a real chicken biryani starts with picking the right ingredients. You need fresh and good quality spices. These spices are very important for this dish.
Simple Chicken Biryani Recipe Ingredients
Biryani Masala Powder adds flavor to the ideal biryani. This is a list of spices you can use and amounts to create your own homemade Biryani Masala Powder:
- Cumin Seeds – 2 tablespoons
- Coriander Seeds – 2 tablespoons
- Black Peppercorns – 1 tablespoon
- Cloves – 1 tablespoon
- Cinnamon Stick – 1 medium-sized stick
- Green Cardamom Pods – 1 tablespoon
- Black Cardamom Pods – 1-2 pods
- Bay Leaves – 2-3 leaves
- Nutmeg – a pinch (grated)
- Mace (Javitri) – a pinch

Key Spices for the Authentic Flavor
The fragrant smell and flavor of biryani comes from a combination of spices. Garam masala is the main Indian spice blend that provides the base. Look for premade mixes or make your own with a recipe for a personalized experience.
Biryani masala, specifically prepared for this, enhances not only taste but also aroma. If you can’t find it, you can substitute garam masala powder instead for similar results. Red chili powder gives it some spice, so adjust your quantity depending on how spicy hot you go.
Turmeric powder adds a warm flavor and gives the rice a bright yellow color, making it look nice. To get stronger flavors, lightly roast whole spices before grinding them. This way, you bring out their great smell and taste even more.
The rice and chicken you choose are also key. Use aged basmati rice for a fluffy texture. Select tender and tasty cuts of chicken for the best results. By choosing quality ingredients, you’re getting ready for a biryani that is full of flavor.
Choosing the Right Rice and Chicken
Choosing the right rice for your biryani is very important. Aged basmati rice is the best choice. It has long grains, a nice smell, and cooks up fluffy. This makes it perfect for biryani.
Chicken thighs are great for biryani, but chicken breasts are leaner. Bone-in chicken thighs remain juicy and tender while cooking. They also add great flavor to the rice.
You should get chicken thighs from your local butcher. It is best to choose free-range or organic chicken when you can. Good ingredients make a big difference in your biryani.
Read more- How to cook chicken korma at home
Preparing Your Kitchen for Simple Chicken Biryani Recipe
Setting up your kitchen is an integral part of preparing biryani. Getting the right tools and keeping things neat helps with an easy rhythm for cooking. When you gather everything, you need ahead of time, you can pay attention to each step. This makes the whole experience more fun.
Must-Have Cooking Equipment
A large pot or Dutch oven is very important for making biryani. It gives enough space to layer and cook the ingredients just right. A heavy-bottomed pot helps heat spread evenly. This stops food from sticking and makes sure everything cooks well.
Most people make biryani in the stovetop, but a pressure cooker is a quicker alternative. It reduces cooking time dramatically, which is great for anyone who ever desired a faster meal. Just be sure to follow the exact instructions from the pressure cooker for your own safety and result. Finally, to cut your ingredients to a safe and efficient size, you need a good chef’s knife and a stout cutting board.
Organizing Your Workspace For Simple Chicken Biryani Recipe
A tidy workspace makes cooking biryani easier and keeps things orderly. First, gather all your prepared ingredients and place them close by. Make sure you have enough bowls and containers to avoid rushing at the last moment.
Set up your area for smooth cooking. Place your cutting board and knife on one side, and keep spices and other ingredients close to you. To stop mixing raw meat with other foods, use different tools for each.
If you take a few minutes to organize before you start, you will have a simpler and more enjoyable cooking time.
Step-by-Step Guide How to Make Chicken Biryani at Home
Now that you know about the history, types, and key parts of biryani, it’s time to start cooking! This simple step-by-step guide will help you make a tasty chicken biryani.
You will learn how to marinate the chicken and then layer and cook it. Every step matters in creating the rich flavors and smells of this favorite dish.
Step 1: Marinating the Chicken
The secret to a flavorful chicken biryani is the marinade. Marinade used with chicken in biryani is a mixture of many cooking spices and ingredients that covers the part of this meat. These are the ingredients of biryani chicken marinade with their measurements:
- Chicken (bone-in pieces) – 1 kg
- Yogurt – 1 cup
- Ginger-garlic paste – 2 tablespoons
- Lemon juice – 2 tablespoons
- Red chili powder – 1 teaspoon
- Turmeric powder – 1/2 teaspoon
- Garam masala powder – 1 teaspoon
- Cumin powder – 1 teaspoon
- Coriander powder – 1 teaspoon
- Salt – as per taste
- Fresh coriander leaves – a handful, chopped
- Fresh mint leaves – a handful, chopped
- Vegetable oil or ghee – 3 tablespoons


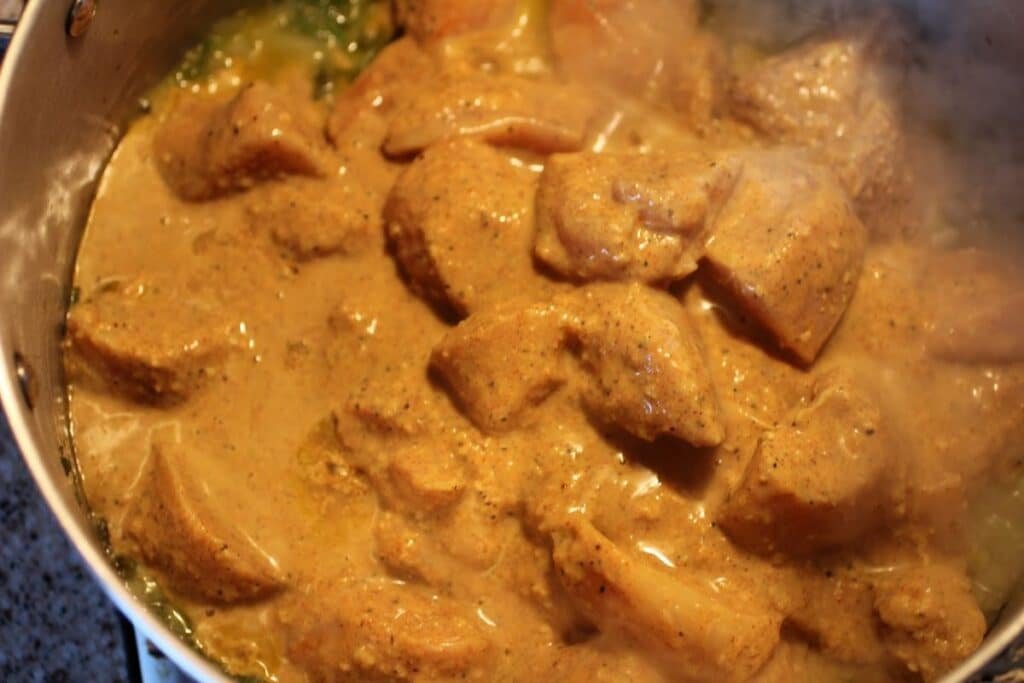
Begin by combining ginger garlic paste, yogurt, and a blend of spices in a large bowl. Marinade it with red chilli powder, turmeric powder, garam masala and a bit of lemon juice. The yogurt works on your chicken to help it become tender.
Once you prepare the marinade, coat the chicken pieces well. Make sure every part is covered in the mix. You see in the picture that a very beautiful color appears in the bowl with mixture of chicken and all spicy masalas.
For maximum flavor, allow the chicken to marinate in the refrigerator for a minimum of 2-3 hours. If it’s possible, let it sit overnight in the fridge. This allows the flavors to permeate the chicken, for tenderness and flavor. Note that the longer you marinate the chicken, the more flavor and tenderness it will have.
Step 2: Cooking the Rice to Perfection
While the chicken is marinating, let’s work on the rice. First, rinse the basmati rice under cold water. Keep rinsing until the water is clear. This will get rid of extra starch.
Next, take a large pot. In it, combine the rice with water, salt, and a few nice extras like a bay leaf, cardamom pods, some peas, carrots and cloves.
Bring the water to a boil. Then, reduce the heat to a simmer. Cover the pot with a lid that fits snugly. Cook it for about 15-20 minutes, until the rice is done but still has a bit of firmness. Do not let it overcook or get mushy.
After the rice is ready, drain any extra water. Use a fork to fluff the rice gently. Keep the cooked rice covered to stay warm.
Step 3: Layering and Cooking on Dum
Then comes the fun part: cooking the biryani on “dum.” Start by heating ghee or oil in a large pot or Dutch oven over medium heat. Afterward, add in the marinated chicken and brown it from all sides. This will make it a lovely golden color, and better flavored. Then, take out the chicken, and add the basmati rice to chicken mixture.
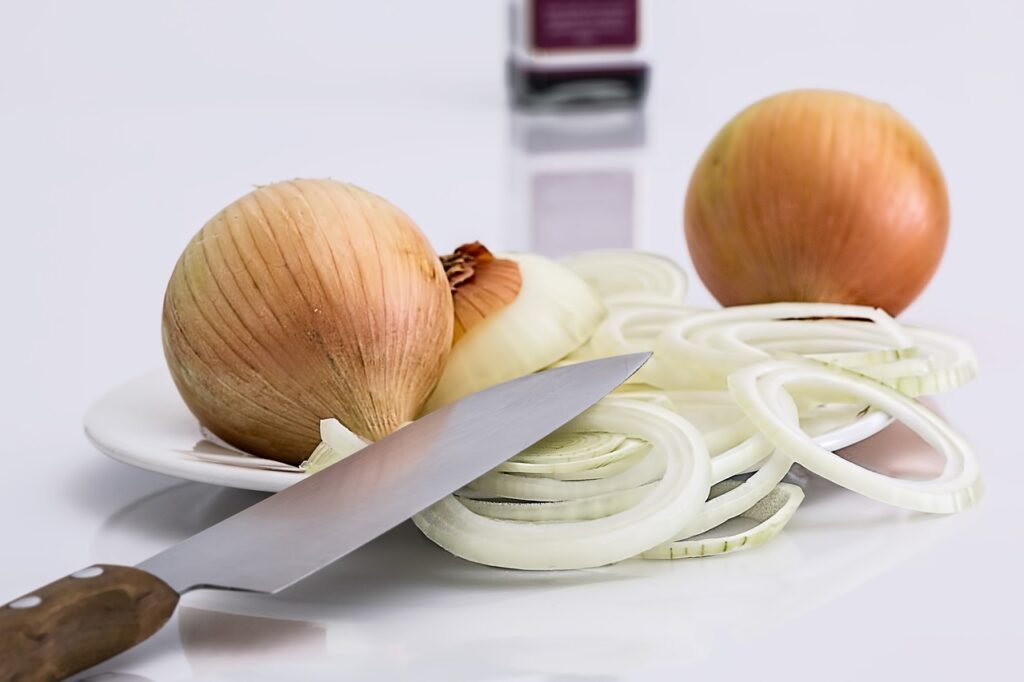
In the same pot, add a layer of partially fried onions. Next, spread half of the cooked rice over the onions. Then, lay the browned chicken pieces over the rice, scattered throughout. Finally, layer with the remaining rice on top of the chicken for presentation. If you’re simmering the pot on low heat with a tightly fitting lid, simmer for 15 to 20 minutes, to ensure the rice is cooked through and the flavors have time to seep in.
Cover the pot tightly with a lid. To make it even better, you can seal the edges with dough. This will trap the steam and create the ‘dum’ effect. This helps the biryani to cook slowly and soak up all those tasty flavors.
Step 4: Garnishing and Serving
As the biryani cooks, get your garnishes ready. Mix warm milk with a little saffron. This will create a nice golden color and a sweet smell. Chop fresh coriander leaves to add some color and freshness.
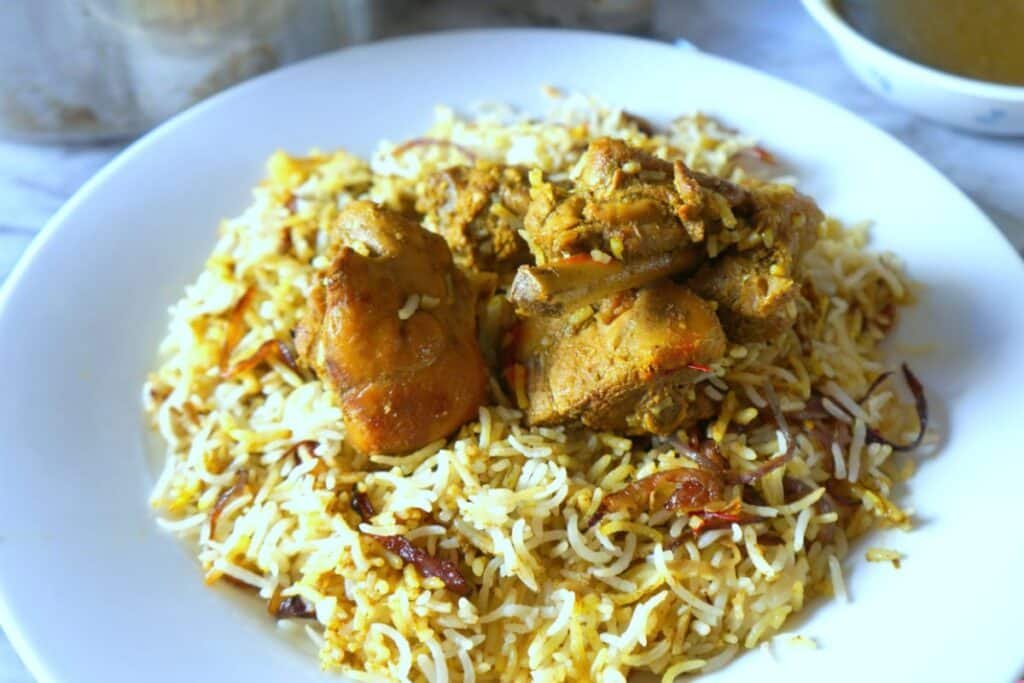
When the biryani is cooked, use a fork to fluff the rice. Be careful not to break the chicken pieces. Move the biryani to a serving dish, layering the rice and chicken to show off their bright colors and textures.
Pour the saffron milk over the biryani for a special touch. Add fresh coriander leaves on top. Finish with crispy fried onions for a tasty crunch. Now your delicious biryani is ready to enjoy!
Simple Chicken Biryani Recipe: Common Mistakes to Avoid
For making the perfect biryani, you must know the common mistakes and the attention that is needed. Overcooking the rice or skimping on marinating the chicken can turn a great biryani into a bad meal.
But you can easily avoid these mistakes with a little care. When you focus on each step, your biryani will be amazing.
Overcooking the Rice
The biggest error in biryani making is overcooked rice. Anyone who loves biryani will tell you that sad, mushy rice can ruin the whole deal. To prevent this from happening, be sure to use the correct amount of rice and water according to your recipe.
Next, use the right cooking method. First, bring the water to boil. Then reduce the heat, cover the pot tightly and cook the rice gently. This low, gentle heat allows the rice to absorb the water without becoming soaking wet.
Finally, remember that the rice is still cooking from the heat lingering in the pot after you remove it from the stove. So, it’s best to just undercook the rice a little bit. Doing so will yield you grains of rice that are perfectly cooked, not a sticky, mushy mess.
Not Marinating Chicken Long Enough
One of the most common mistakes that will ruin the flavor is not allowing the chicken to marinate, long enough. The marinade will infuse the chicken with flavor and also help tenderize the meat. Skip this crucial step, and the chicken can end up bland and tough, and that’s bad for your biryani.
For maximum flavor and tenderness, marinate the chicken at least two hours. Its best to marinate it overnight in the fridge for better results. The longer you let it marinate, the more the spices and yogurt soak in, so the chicken is flavorful and so tender.
Keep in mind that the secret to great biryani is letting the chicken marinate for enough time to do its job.
Enhancing Your Biryani

Once you are comfortable with the simple chicken biryani recipe, think about adding your own personal touches. The great thing about biryani is that it is not only complex but also flexible.
You can try using different spices and adding special ingredients. The options for customizing your biryani are unlimited.
Experimenting with Aromatics
The basic spice blend in biryani is full of flavor. You should try adding more aromas to it. Cumin seeds have a warm, earthy smell. You can put them in oil or ghee while browning the chicken. This will add a nutty taste.
Green cardamom is stronger than black cardamom. It gives a bright, citrusy flavor that goes well with other spices. Lightly crush a few pods before adding them to the rice while cooking.
Star anise is not used in every biryani recipe, but it has a special licorice flavor that many people love. Make sure to use it carefully. One star anise is enough to bring its unique smell to the dish.
The Role of Saffron and Rose Water
Saffron is bright in color and smells unique. It makes biryani feel special. Soak a few strands in warm milk or water. This helps get the color and flavor out. The result is saffron milk, which you can drizzled over the dish. If you want something extra nice, you might add a little rose water and cups water for rice.
Rose water comes from rose petals. It has a light floral smell and a sweet taste. These go well with the rich flavors of biryani. Try adding one or two teaspoons to the saffron milk. This will give your biryani a special touch.
Side Dishes That Complement Chicken Biryani
No biryani feast is done without tasty side dishes to go with the main dish. These sides give a nice break from the strong flavors of biryani.
From cool raitas to tasty curries, these sides add a great balance and improve the whole meal.
Raita: The Perfect Cooling Agent
Raita is a yogurt dip that goes really well with biryani. It helps to cool down the rich and spicy flavors of the dish. Each bite feels refreshing because of it. The most popular raita includes grated cucumber. Cucumber adds coolness and is mixed with creamy yogurt, a bit of salt, and chopped mint leaves for extra taste.
You can also find other kinds of raita that mix in diced onions, tomatoes, or even roasted vegetables. These add new flavors and textures. If you want a stronger taste, use Greek yogurt. It is thicker and has a tangy flavor.
Salan: A Spicy Accompaniment
Salan is a spicy curry often served with biryani. It adds a tangy and spicy flavor that goes well with the dish. Tamarind is a sour ingredient used in many salan recipes. It gives a unique tanginess that balances the richness of biryani.
To prepare salan, cooks combine red chili powder, ginger-garlic paste and a variety of spices. Their recipe calls for simmering these ingredients to make a flavorful, extra-tasty gravy. Also, this spicy and tangy combo is perfect for those who crave bold, potent flavors.
Salan pairs perfectly with Hyderabadi biryani.
Storing and Reheating Tips – Simple Chicken Biryani Recipe
The taste and texture of your leftover biryani depends on how you store and reheat it. It can hold for a few days this way. Once it has cooled to room temperature, immediately store the biryani in the fridge. Use an airtight container to prevent moisture from escaping.
When you reheat it, use methods that retain moisture and heat evenly. This will help you avoid overcooking and give you a tasty second serving.
Best Practices for Refrigeration
How to properly store leftover biryani in refrigerator and keep it fresh and edible? First thing, allow the biryani to cool and come to room temperature. This prevents moisture from accumulating in the container, which could lead to bacteria growth.
After the biryani cools down, transfer it to an airtight container. Seal the container tightly to minimize air and moisture exposure. When stored properly, a biryani has a shelf life of 3-4 days in the refrigerator without compromising on taste or quality.
If you want to store it longer, think about freezing it in portion sizes using freezer-safe bags or containers. When you want to eat it, thaw the biryani in the refrigerator overnight. Then, reheat it well before serving.
How to Reheat Without Drying Out
Reheating biryani can be tricky if you want to keep its moisture and taste. Microwaving is quick, but it can make the biryani dry. To stop this, add a little water on top before you heat it.
The slowest option is using an oven; however, many believe this to be better. First, heat your oven to reasonably low, somewhere around 250-300°F (120-150°C). Instead, you can transfer the biryani into oven proof dish (cast iron, clay pot) and cover tightly with a foil. Then, warm it for 15 to 20 minutes, or until heated through.” Regardless of how you reheat it, don’t forget to add moisture. A second serving, reheating the biryani gently and evenly, is delicious.
Conclusion
In conclusion, making Chicken Biryani at home is a fun and rewarding experience. It combines flavors and traditions. You start by marinating the chicken. Next, you layer the rice and cook it on dum. Each step adds to the wonderful taste of the dish. Be careful not to overcook the rice. You should also use fragrant spices and pair your Biryani with Raita and Salan.
Just make sure you store and reheat it right, so you can keep munching on it. Whether you are a rookie cook or a kitchen professional, making Biryani will be a delicious voyage across its rich flavors and dynamics. Cooking, enjoy, don’t forget to share Chicken Biryani with others!
Frequently Asked Questions
Can I Use Brown Rice for Biryani?
Brown rice, on the other hand is healthy, but makes you miss basmati rice. It will take longer to make and may not achieve the light and fluffy texture of a standard biryani. You do, however, could try to use brown basmati rice for a healthier option.
How Long Can I Store Chicken Biryani?
Chicken biryani can be stored in the fridge properly sealed for 3-4 days. You should freeze it if you want to keep it for a longer time. When you reheat it, be sure to get it up to temperature all the way through, so you can safely and enjoyably eat its fresh-baked taste.
Is It Possible to Make Biryani in a Pressure Cooker?
A pressure cooker cuts down cooking time a lot. The texture may change a little, but it is a handy way to make biryani faster. Make sure to follow your pressure cooker’s instructions for cooking times.
Can I Substitute Beef or Mutton for Chicken?
Sure! Beef and mutton are great options for biryani. Just remember to change the cooking times. Beef and mutton usually need to cook longer than chicken. This will change the taste, giving his biryani a unique flavor.
Advanced Tips for Biryani Enthusiasts
Elevate your biryani by using some new techniques. You can add layers of fried nuts, dried fruits, or even edible flowers. Try using unique ingredients like Kewra water or rose essence. They can improve the smell and look of your dish.
Infusing Smoke Flavor for Authenticity
For a real smoky taste, try the traditional “dhungar” method. Put hot charcoal on a piece of foil. Add ghee or oil on top. Then, cover the biryani pot for a few minutes. This will let the smoke add flavor to the dish.
Mastering the Art of Dum Cooking
“Dum” cooking is a slow way of cooking in a sealed pot. This technique is very important for getting the rich flavor in biryani. When you master it, the ingredients blend well. The steam moves around inside the pot, making sure every grain of rice is full of tasty aroma.
Sharing Your Biryani with the World
Share your biryani story! Invite friends for a biryani party where you can show off different types from various regions. Sharing food helps bring people together and lets us learn about different cultures.
Hosting a Biryani Potluck
Organize a biryani potluck and ask your guests to bring different types. This is a great way to enjoy the variety of biryani. It also helps create a feeling of community through sharing food.
Biryani Photography Tips for Social Media
Capture the beauty of your biryani for social media. Use natural light to brighten the dish. Show off its layers and textures. Garnish it in a fun way. Good visuals will attract other food lovers.
The Cultural Significance of Biryani in the United States
Biryani is very popular in the US, showing how much the Indian-American community matters. It stands for a mix of cultures and how food traditions change for new people.
Biryani: More Than Just a Meal
Biryani is more than just a meal. It represents togetherness, family customs, and special celebrations. When people share a pot of biryani, they create a bond and share happiness. This makes the experience of enjoying biryani truly unique and special.


Pingback: How to Make Chicken Korma Curry: Step by Step -