
Md Soriful Islam

Elegant entryway decorated with a stylish console table, gold-framed mirror, vases with fresh flowers, and ambient lighting—perfect inspiration for welcoming home decor.

Entryway Decorating Ideas: 5 Must-Haves for a Warm Welcome

Discover entryway decorating ideas to make a great first impression at home. Get simple tips, storage solutions & top product picks for a welcoming foyer. Entryway Decorating Ideas: Get Amazing HOme Decorating Ideas Your entryway is the first thing people see when they step into your home, so it’s important to make it count. You know the saying, “You never get a second chance to make a first impression,” and it holds true for home design. In fact, research suggests homebuyers form first impressions within the first eight seconds of walking through the door. A beautiful, organized entry hall doesn’t just impress guests – it can even add real value to your property (one study found an attractive front entryway can increase a home’s value by up to $24,000). But you don’t need a mansion or a big budget to create an inviting foyer. In this guide, we’ll share easy entryway decorating ideas that anyone can try, even on a small budget or in a tiny space. We’ll also highlight 5 top-rated Amazon products – from stylish furniture to handy storage pieces – that can help transform your entryway into a warm, welcoming space. By the end, you’ll have plenty of tips and inspiration to make your home’s entrance both beautiful and functional. Let’s get started! Why the Entryway Matters (First Impressions & Functionality) Your home’s entryway wears many hats. It’s a greeting space for guests, a drop zone for shoes and keys, and a preview of your interior style. A well-decorated entryway sets a welcoming tone for your entire home. It should wow visitors and also work hard for your daily life. This means balancing style and function in a small area. A cluttered, dark foyer can feel uninviting, while a thoughtfully decorated one feels cozy and organized. Here are a few reasons not to overlook your entryway: Tip: Stand at your front door and take a quick scan of your entryway. What’s the first thing you notice? Make that spot count with something attractive – like a piece of art, a mirror, or a neat console table display – so your eye lands on a pleasant view right when you enter. 7 Simple Entryway Decorating Tips (That Anyone Can Do) Now that we know why the entryway is so important, let’s dive into some simple decorating tips. These ideas will help you create a functional and beautiful entry, whether you have a roomy foyer or a tiny hall. You don’t need to hire a designer – these are DIY-friendly and budget-friendly tips that even a 7th grader can understand and enjoy! 1. Define Your Entry “Zone” Not all homes have a distinct foyer or mudroom – you might walk straight into a living room or a hallway. Even so, you can define an entryway area so it feels like its own space. Use a rug or runner to visually separate the entry. A small entryway rug near the door can make it clear where to wipe feet and drop shoes. (Choose a durable, washable rug for high-traffic use. For example, a 3×5 ft washable rug with a non-slip backing is perfect for an entry – many are stylish and stain-resistant, blending form and function.) You can also use furniture like a console table or bench to delineate the “welcome area.” Defining the zone helps contain clutter too. It signals, “This is where bags and shoes go.” This way, even a studio apartment can have a mini-entryway that feels intentional. 2. Light It Up Good lighting instantly makes any space more inviting, and entryways are no exception. If your foyer has overhead lighting, consider updating an old fixture to a statement chandelier or a charming pendant lamp that matches your decor style. In a small entryway without a wired light, plug-in options work great – for instance, a table lamp on a console or a floor lamp in a corner. Soft, warm light welcomes you in and helps you find your shoes (bonus!). Lighting isn’t just practical; it’s also a chance to add style. A classy light fixture can be a focal point that wows. According to interior designers, lighting is one of the “key components to a gorgeous entryway,” right alongside storage and seating. And don’t forget natural light: if you have a window or glass in your front door, keep it clean to let that sunshine stream in during the day. Tip: Put your entryway light on a dimmer if possible. Bright light is great when you’re coming home with groceries, but a softer glow is lovely when greeting guests for an evening gathering. It also lets you leave a gentle light on at night so the first thing you see in the morning is a cozy, lit space. 3. Hang a Mirror to Open Up the Space One of the oldest tricks in the decorator’s handbook is using mirrors in small spaces – and it works like magic in entryways. A mirror helps in two ways: it’s handy for last-minute looks at yourself before heading out the door, and it makes the area feel larger and brighter. Mirrors reflect light, bouncing illumination around and eliminating gloom. They can “help visually expand your space…they reflect light, making a small space feel larger.” If your entryway is narrow or dim, try hanging a medium to large-sized mirror on one wall (opposite a window or light source, if possible). Even in a bigger foyer, a beautifully framed mirror above a console table adds classic style. There are many designs – sleek round mirrors are very popular in modern decor, or you might choose an ornate rectangular mirror for a more traditional look. Pro tip: position the mirror so it reflects something attractive, like artwork on the opposite wall or the outdoors, rather than a cluttered area. This doubles the pleasing view. We’ve even written about creative ways to decorate with mirrors in our blog before – they’re that useful in home décor (see our guide on using mirrors

Entryway Decorating Ideas: 5 Must-Haves for a Warm Welcome Read More »

Infographic showing four simple tips to make your home smell good: open windows, use candles, try essential oils, and bake something.

How to Make Your Home Smell Good- 10 Simple Tips

Make your home smell fresh and inviting with easy tips and top-rated products. Discover natural tricks and the best odor eliminators for a great-smelling house. How to Make Your Home Smell Good- Best Home Advice Walking into a fresh-smelling home instantly puts you in a good mood. In fact, 77% of people say the smell of home comforts them, making them feel relaxed and happy. Our sense of smell is powerful – research suggests 75% of our daily emotions are influenced by scent, and a pleasant fragrance can improve mood by up to 40%. So, how can you make your home smell good all the time? This guide will walk you through simple tips (even natural methods) and some amazing products that will leave your house smelling wonderful. Let’s dive in and get your home smelling fresh and inviting! Fresh scents can instantly uplift your home’s atmosphere. From clean citrus aromas to calming lavender, the right smell makes any space feel cozier and more welcoming. Below, we’ll explore how to eliminate bad odors (so you’re not just masking smells) and then add delightful fragrances that last. We’ll also review five top-rated Amazon products – including candles, diffusers, and odor absorbers – so you can choose what works best for your home. By the end, you’ll know how to keep your house smelling good, naturally and effortlessly! Why a Good-Smelling Home Matters Having a good-smelling home isn’t just about impressing guests – it also affects your comfort and well-being. Our brains connect smells with emotions and memories. Think about coming home to the smell of fresh-baked cookies or a breezy clean laundry scent. It likely makes you feel happy and calm. Businesses even use scent marketing (like fancy hotels that pump signature fragrances into lobbies) to create positive experiences for visitors. At home, pleasant scents can reduce stress and boost your mood. On the other hand, bad odors can make even a clean house seem unwelcoming. If you’ve ever been away for a few days, you might notice the “smell of home” when you return. Over half of Americans (51%) even say they miss the comforting scents of home when they’re gone – that’s called “scent-stalgia”! A lovely home aroma can also impress visitors; it’s often the first thing people notice when they step inside. So, let’s look at how to achieve that fresh, cozy scent everyone loves. 1. Start with a Clean Slate (Eliminate Bad Odors) The first step in making your home smell good is to get rid of sources of bad odors. There’s no point in adding nice fragrances if foul smells are lurking. Here’s what to do: Tip: Keep an open box of baking soda in the fridge and closets. Baking soda is a cheap, natural odor absorber that will soak up funky smells from leftovers or musty clothes. 2. Let Fresh Air In One of the simplest and cheapest ways to refresh your home’s smell is opening the windows. Fresh outdoor air can work wonders by chasing out stale, smelly air. Even in winter, cracking a window for a few minutes helps. Studies show that airing out your home can radically reduce indoor odors and even cut down bacteria growth that cause smells. Basically, you’re letting all the bad smells float outside and replacing them with clean air from outside. Try to ventilate your home daily: open windows or doors on opposite sides to create a cross-breeze for 5–10 minutes. This pushes out cooking smells, stuffiness, or any odor buildup. If it’s too cold or hot to open up regularly, consider using fans or an air purifier to keep air moving and filtered. Also, check your HVAC or AC filters; a dirty filter can circulate a musty odor, so replace filters every couple of months for fresher airflow. Tip: In nice weather, opening windows not only freshens the air but also brings in natural scents from outside (like cut grass or rain). After cleaning the house, prop open a window – it makes the whole home smell truly clean rather than just covering odors with spray. 3. Use Natural Odor Absorbers Instead of just masking smells, it’s smart to neutralize odors at the source. There are great natural odor absorbers you can place around your home: If you prefer something green, you can also use houseplants to help with odors. Certain indoor plants (like snake plants or peace lilies) act as natural air purifiers – they won’t perfume your room, but they do help filter the air and keep it from getting stuffy. Adding a few air-purifying indoor plants (like those featured in our Dream Home Heaven gardening post) can quietly boost freshness while also decorating your home. Tip: Simmer a small pot of white vinegar on the stove for 15 minutes to neutralize a nasty odor (like after frying fish or cooking something pungent). Vinegar’s smell disappears quickly but it helps eat away bad odors in the kitchen air. 4. Add Pleasant Fragrances (The Natural Way) Once you’ve cleaned and aired things out, it’s time to make your home smell good! You can do this in natural, DIY ways before resorting to store-bought air fresheners. Here are a few natural scent tips: Tip: Want your home to smell extra cozy for a special day? Try baking something delicious! Popping a tray of cookies or bread in the oven can fill your home with an irresistible scent. Realtors often advise baking cookies before an open house because the warm, sweet smell makes people feel right at home. So before guests come over, you could bake a quick batch of cinnamon rolls – your house will smell heavenly (and you get a tasty treat too!). 5. Scented Candles and Wax Melts One of the most popular ways to make your home smell good is by using scented candles. Candles add both fragrance and a cozy atmosphere with their flickering flame. You can find candles in countless scents – from fruity and food-inspired (vanilla, apple pie) to

How to Make Your Home Smell Good- 10 Simple Tips Read More »

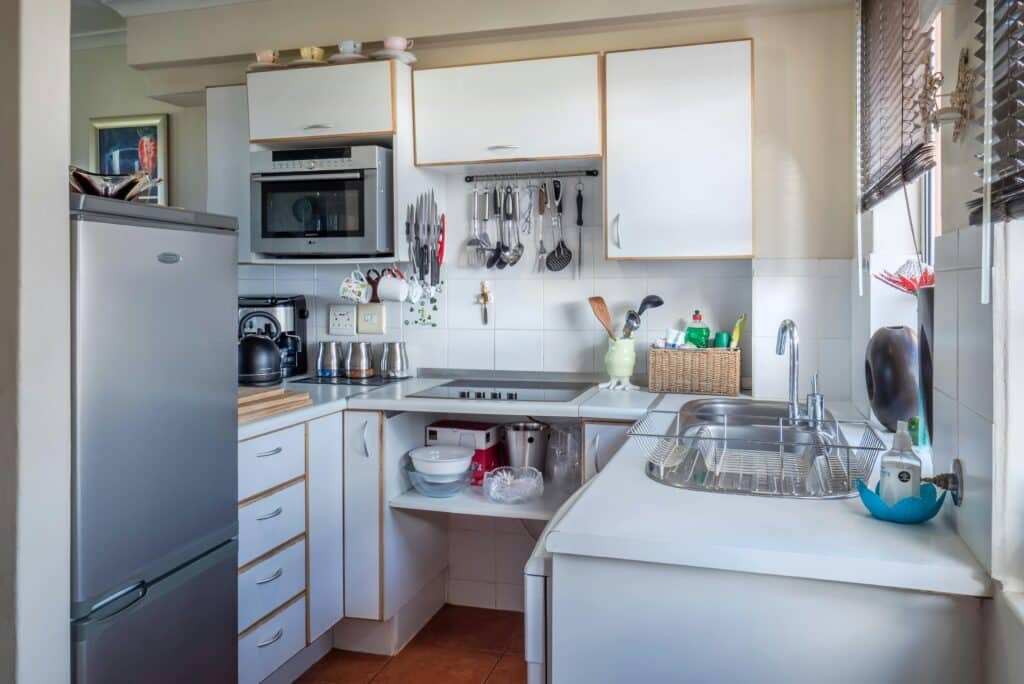
Sophisticated kitchen interior with modern appliances, wooden accents, and functional design representing Kitchen Counter Organization Ideas.

Kitchen Counter Organization Ideas for a Clutter-Free Home

Looking to source custom-designed placemats? Discover top-quality options, flexible pricing, and reliable delivery for your home décor business. Kitchen Counter Organization Ideas: Top Quality Options A clutter-free and organized kitchen counter instantly makes your kitchen feel more spacious and inviting. Keeping your counters neat isn’t just about appearances – it can actually save you time, reduce stress, and even improve your mood. In fact, a recent survey found 95% of homeowners feel “in control” when their home is organized. A tidy kitchen gives you that sense of calm and control in one of the most used spaces of your home. If you’re tired of rummaging through countertop chaos or knocking over spice jars while cooking, this guide is for you. We’re about to explore practical kitchen counter organization ideas that will declutter your space and make daily life easier. From clever storage hacks to top-rated organizers, these tips will help transform your counters from messy to magnificent. Why Organizing Your Kitchen Counter Matters An organized kitchen counter isn’t just nice to look at – it’s truly life-changing in a busy household. Think about how often you use your kitchen counters for meal prep, cooking, packing lunches, or even as a makeshift desk. Keeping that surface orderly has big benefits: In short, organizing your kitchen counter matters for both practical and personal reasons. You’ll cook more efficiently and actually enjoy being in your kitchen when it’s clean and orderly. Now, let’s dive into how to make it happen. Quick Tips to Declutter Your Countertops Before adding new organizers or storage solutions, start with a good old declutter session. Here are some quick wins to instantly streamline your counters: In addition, for a deeper reset, you could even remove everything from your counters and only put back the essentials. (If you’re really inspired to deep-clean and start fresh, check out our guide on giving your space a thorough cleanse – it’s a mood booster to see a perfectly clean surface!) With a decluttered foundation in place, you’re ready to add smart solutions that keep things organized for good. Top Products for Kitchen Counter Organization Decluttering is step one; step two is equipping your kitchen with the right organizers to maintain that order daily. We’ve rounded up 5 top-rated Amazon products that can help organize your kitchen counters, each targeting a common clutter culprit – from spice jars to cooking utensils. Also, these picks have rave reviews and blend practicality with style. Let’s explore how each one can transform your counter chaos into tidy bliss. 1. Kamenstein 20-Jar Revolving Spice Rack – Spice Organization Made Easy If your counter is littered with random spice bottles, this revolving spice rack is a game-changer. The Kamenstein 20-Jar Spice Rack is one of Amazon’s top-rated spice organizers – and for good reason. It comes pre-filled with 20 spices (everything from basil to paprika) in identical jars that nestle into a rotating carousel. Why it’s awesome: This rack keeps all your spices in one compact, vertical space. You can spin the carousel to quickly find the spice you need, rather than digging through a messy cluster of jars. The jars are labeled on the caps for easy identification and refillable for long-term use. As a bonus, Kamenstein includes free spice refills for 5 years, so you’ll always have fresh seasonings on hand! Key features: How to use it: Pick a spot near your prep area or stove to place the spice rack – that way, your go-to flavors are always within arm’s reach when cooking. With this attractive carousel on the counter, you’ll save time and eliminate the visual clutter of dozens of mismatched spice containers. It’s a simple addition that makes a huge difference in countertop organization. 2. OXO Good Grips Rotating Utensil Holder – Tame Your Cooking Tools No more digging through messy drawers for a spatula – a quality utensil holder keeps all your cooking tools upright and accessible right on the counter. One top choice is the OXO Good Grips Stainless-Steel Rotating Utensil Holder (widely loved with a 4.8-star average on Amazon). This sleek canister is roomy enough for 15+ utensils and has a clever spin feature. What makes it great: The OXO utensil holder is divided into sections inside, so you can group spoons, spatulas, tongs, etc., and they won’t all clump together. The base swivels 360° smoothly, allowing you to turn the holder and grab exactly the tool you need without knocking others over – super handy when you’re multitasking at the stove. Its stainless-steel construction with a weighted, non-slip base means it won’t tip over or slide, even when it’s fully loaded. Highlights: Place this holder next to your stove or food prep area, and load it up with your everyday cooking instruments. Not only will it organize your counter, but it also adds a touch of modern style with its stainless finish. Many home cooks say this is the “ultimate organizer” for keeping their counters utensil-clutter free. Instead of a bouquet of utensils spread across your counter, you’ll have them contained upright in one sleek spinner. 3. Sorbus 3-Tier Bamboo Countertop Shelf – Expand Your Storage Vertically When counter space is at a premium, think vertical. A multi-tier organizer shelf lets you store items upward rather than across the counter. The Sorbus 3-Tier Bamboo Countertop Organizer is a popular solution that adds two extra levels of storage in the same footprint as a dinner plate. Design & features: This attractive shelf unit has three tiers where you can place spices, jars, canisters, or even decor. It’s made of eco-friendly bamboo with a natural wood grain that looks great in any kitchen. Each tier is a different depth, allowing larger items on the bottom and smaller up top. The top shelf is adjustable in height, so you can customize the spacing to fit taller bottles or canisters. It’s wide enough to hold a lot, yet the open design keeps things airy and not bulky. Why you’ll love it: Using

Kitchen Counter Organization Ideas for a Clutter-Free Home Read More »

Contemporary indoor dining and kitchen area with trees for air clean representing Best Indoor Plants for Clean Air.

Best Indoor Plants for Clean Air – 2025 Guide

Discover the best indoor plants for clean air. Boost your home’s health and style with air-purifying houseplants that are easy to care for and beautiful. Best Indoor Plants for Clean Air – Top Air-Purifying Houseplants for a Healthier Home Imagine coming home to a room full of lush green leaves and cleaner air. It’s not just a dream – houseplants can help remove certain toxins from indoor air while making your home prettier and more relaxing. In fact, a famous 1989 NASA study found that common indoor plants can absorb harmful chemicals like formaldehyde and benzene from the air (in sealed chambers with low airflow). While you won’t turn your living room into a rainforest, even a few air-purifying plants can contribute to a fresher atmosphere and boost your mood. The best indoor plants for clean air are often easy to grow, and many double as lovely décor pieces or even pet-safe greenery. In this friendly guide, we’ll explore all types of air-purifying indoor plants – including low-maintenance plants, pet-safe plants, plants for bedrooms, decorative statement plants, and NASA-approved air-cleaners. You’ll learn about each plant’s air-cleansing abilities and decorative benefits in a simple, conversational way (no bot-speak, promise!). We’ve also reviewed 5–6 top plant products – from live plant bundles to stylish planters – to help you easily bring these green allies into your home. Let’s dive in and discover which houseplants can help you breathe easier and create your dream healthy home! How Do Plants Clean Indoor Air? (The NASA Study & Beyond) Indoor air can harbor pollutants like formaldehyde (from furniture and carpets) and benzene (from paints and cleaners). Plants naturally take in carbon dioxide and release oxygen, but some also absorb those volatile organic compounds (VOCs) through their leaves and roots. NASA’s Clean Air Study in 1989 tested 19 houseplants and found they could remove notable amounts of VOCs in a sealed space. For example, a snake plant (Sansevieria) was shown to filter formaldehyde, and a peace lily removed benzene and trichloroethylene from the air. The plant’s roots and soil microbes play a key role in breaking down pollutants into nutrients for the plant – essentially the plant “eats” those chemicals! It’s important to note, however, that in a typical home with normal ventilation, you’d need a large number of plants to dramatically improve air quality. One research review even noted that ventilation does far more than a few potted plants can. Still, having several houseplants can help contribute to cleaner air on a small scale, especially in closed rooms, and they offer other benefits like higher humidity and reduced stress. NASA scientist Dr. B.C. Wolverton, who led the study, famously recommended at least one plant per 100 square feet of space for some air-purifying effect. So while your fern and rubber plant won’t replace an air purifier, they do quietly work in the background to absorb toxins, emit oxygen, and boost humidity – all while looking beautiful! (Fun fact: Some modern planters like the “AIRY” pot are designed to enhance air cleaning by ventilating plant roots. But even a basic potted plant can be helpful, as long as it’s healthy and growing!) Top 10 Air-Purifying Indoor Plants (By Category) Now let’s meet some of the best indoor plants for clean air and see what makes each special. We’ve organized them into categories so you can find the perfect green friend for your needs: 1. Low-Maintenance Air-Purifying Plants Not a natural green thumb? No worries! These hardy houseplants thrive on a little neglect and still help cleanse the air: Snake Plant (Mother-in-Law’s Tongue) – Sansevieria trifasciata Snake plants (Sansevieria) are known for their tall, stiff leaves edged in yellow. They rank among the best indoor plants for clean air and are extremely easy to care for. Air-cleansing: Snake plants were highlighted in the NASA study for removing formaldehyde from the air. They perform photosynthesis at night, converting CO2 to oxygen, which makes them great for bedrooms too. Decorative appeal: With their sleek, sword-like leaves, snake plants bring a modern, architectural look to any room. They’re often called “indestructible” – tolerating low light, infrequent watering, and general neglect. Place one in a dim corner, and it will still happily grow (just water roughly once a week). Care tips: Allow the soil to dry between waterings. They prefer bright indirect light but survive in low light. If you’re forgetful with watering, a snake plant is your new best friend! (Note: Mildly toxic to pets if ingested, so keep out of nibbling range of cats or dogs.) Golden Pothos (Devil’s Ivy) – Epipremnum aureum Air-cleansing: Pothos is famous for filtering formaldehyde, benzene, and xylene from indoor air. It’s often recommended as an easy “starter” air-purifying plant.Decorative appeal: This vine has cascading green-and-gold leaves that trail beautifully from a hanging basket or shelf. It’s a fast grower; you can trim and propagate cuttings easily.Care tips: Thrives in low to bright light (no direct sun needed). Water roughly once a week, when the top inch of soil is dry. Pothos will tell you when it’s thirsty – its leaves start to droop. A quick drink, and it perks right up! (Do note: pothos is toxic to pets, so use hanging planters or keep out of reach.) ZZ Plant – Zamioculcas zamiifolia Air-cleansing: While not in the NASA study, the glossy-leaved ZZ plant is believed to help remove toluene and xylene from air and, like most plants, will pump out oxygen.Decorative appeal: ZZ plants have attractive thick leaves with a brilliant shine (they almost look fake!). They add a touch of deep green to low-light spots and are very drought-tolerant.Care tips: Low light is fine for ZZ – it actually prefers avoiding bright sun. Water sparingly (once every 2–3 weeks); it has potato-like rhizomes that store water. If you tend to forget your plants, the ZZ won’t hold a grudge. (Toxic to pets if chewed.) 2. Pet-Friendly Air-Purifying Plants If you have furry friends at home, it’s essential to choose non-toxic plants.

Best Indoor Plants for Clean Air – 2025 Guide Read More »

four black colors Vaccuum cleaner with title How to Deep Clean Your Room

How to Deep Clean Your Room: My Top Picks

Learn how to deep clean your room step by step. Get friendly tips, supplies checklist, and reviews of top self-emptying robot vacuums to make cleaning easy. How to Deep Clean Your Room: A Step-by-Step Guide with Top Robot Vacuums Deep cleaning your room means going beyond a regular tidy-up to remove hidden dust, dirt, and grime. It’s about reaching every corner, from under the bed to the top of your shelves. Not only does a deep clean make your space look great, but it can also help you feel better. A clean room can reduce allergens and germs, and the act of cleaning itself often boosts your mood. In this guide, we’ll show you how to deep clean your room in easy steps. We also highlight some of the best self-emptying robot vacuums to give you a helping hand. Whether you want to remove pet hair or just keep your floors spotless, these smart cleaners can save you time. By the end, you’ll know exactly where to start and how to keep your room fresh and healthy. Why Deep Cleaning Matters Deep cleaning is more than just picking up clutter. It involves cleaning places we often ignore, which can trap dirt and germs. The CDC says regular cleaning removes germs and dirt to help keep your family healthy. The American College of Allergy, Asthma & Immunology also points out that cleaning dust and mold from your home helps everyone breathe easier and avoid allergy symptoms. Cleaning can even help your mind. Living in a messy room can make some people feel stressed or frustrated. Studies show that clutter can increase stress, while cleaning and organizing can boost your mood and sense of control. In short, a clean room can improve your health and happiness. By following a plan for how to deep clean your room, you will cover everything from disinfecting surfaces to refreshing the air. You’ll also get tips on keeping clutter down. For example, Dream Home Heaven’s cleaning checklist highlights often-forgotten areas like washing machine seals and ceiling fan blades. Using a full cleaning list can help make sure nothing is missed. Here’s a quick look at the benefits: Ready to get started? First, gather your supplies and get your game plan ready. Supplies and Prep: Get Ready to Clean Before you start, make sure you have the tools and cleaners you need. Here are some basics: Once your supplies are ready, start with a plan. A good idea is to clean in one direction: from top to bottom and from one corner across the room. That way, dust and dirt won’t fall on an area you’ve already cleaned. Step-by-Step Deep Cleaning Plan Follow these steps to learn how to deep clean your room effectively: 1. Declutter First Removing clutter is often the first step in how to deep clean your room because you need a clear space to clean. Begin by picking up everything off the floor and surfaces. Put dirty clothes in a laundry basket. Throw out trash and items you no longer need. Organize books, toys, and clutter into bins or shelves. Getting rid of clutter lets you clean surfaces more easily. For example, moving objects off your desk and dresser makes dusting faster. Once the floor is mostly clear, it’s easier to vacuum thoroughly. Think of decluttering as making room to actually clean. By starting with a tidy space, you will later catch dust and dirt that was hiding under things. 2. Dust from Top to Bottom Now dust high surfaces first. This is part of how to deep clean your room thoroughly, because it ensures all that dust falls to the floor where you’ll clean it up next. Use a microfiber cloth or a duster to clean ceiling fan blades, light fixtures, and the tops of tall furniture like dressers or bookshelves. These spots often collect dust over time. Dust will fall onto lower surfaces, which we’ll clean next. 3. Change Bedding and Laundry Washing all bedding and fabrics is an important deep cleaning step. It is a key part of how to deep clean your room, since sheets and pillowcases can collect sweat, dust mites, and allergens over time. Strip your bed and put all sheets, pillowcases, and blankets in the laundry. Add any washable rugs or cushion covers. Washing these fabrics removes dust mites, sweat, and allergens that accumulate over time. Don’t forget to rotate and vacuum mattresses if you can. Removing sheets gives you a chance to clean the mattress surface and the bed frame. 4. Wipe Down Surfaces and Fixtures With clutter cleared, clean the accessible surfaces: 5. Vacuum and Mop the Floors Finally, tackle the floors. Vacuum carpets and rugs thoroughly. Vacuum along edges and under furniture. A vacuum’s hose and crevice tool are handy for corners. If you have hard floors (wood, tile, or laminate), vacuum or sweep first, then mop. After these steps, your room should be sparkling clean. Just add fresh bedding and a quick air out by opening a window if you can. Congratulations! You now know exactly how to deep clean your room from top to bottom. Top Self-Emptying Robot Vacuums (Reviews) Using a self-emptying robot vacuum is one of the most convenient ways to keep floors clean. These robot vacuums automatically empty their dustbin into a base, so you don’t have to dump it after every use. They work well for daily maintenance and can save a lot of time. Below are some of the best self-emptying robot vacuums you can find on Amazon, followed by a comparison table. Each of these models is highly rated and helps with deep cleaning tasks: iRobot Roomba j7+ Self-Emptying Robot Vacuum The iRobot Roomba j7+ is a smart robot vacuum known for its powerful cleaning and obstacle avoidance. It has a self-emptying bin that can hold up to 60 days of dirt and debris. The j7+ uses camera and sensor technology to map your rooms and even recognize common pet messes, so it can

How to Deep Clean Your Room: My Top Picks Read More »

Two farmers planting seedlings in a greenhouse show sustainable farming in action.

How to Prepare Soil for Planting Vegetables

Learn how to prepare soil for planting vegetables in Atlanta gardens with easy steps. Improve Atlanta’s clay soil with compost and pH for healthy vegetables. How to Prepare Soil for Planting Vegetables in Atlanta Gardens: Top Tips Atlanta’s gardens often start with heavy red clay soil that drains poorly​. Learning how to prepare soil for planting vegetables in such conditions is key to a great harvest. By loosening the clay and mixing in compost, you’ll give tomatoes, cucumbers, and carrots a healthier place to root. Good soil prep improves drainage and nutrients, leading to stronger plants and bigger vegetables. Georgia’s red clay soil (orange clumps in photo) is dense and low in organic matter but mixing in dark compost improves its structure. Atlanta’s climate is warm and humid, which means soil can alternate between very wet conditions in spring and very dry conditions in summer. Adding organic matter like compost helps the soil retain moisture during dry spells and drain better during heavy rains​. If your ground is extremely hard, another option is to use raised garden beds filled with a quality soil mix. Many Atlanta gardeners use raised beds to overcome clay, but even in raised beds you should mix in compost and check the soil pH. Raised garden beds filled with rich soil are one way to overcome clay. They allow roots to grow without fighting compact ground. Even in raised beds, mixing in organic matter like compost is beneficial for vegetable growth. These raised beds in a community garden show how adding good soil can help vegetables thrive. How to Prepare Soil for Planting Vegetables: Step-by-Step Guide Now, we will explain step by step how you can prepare soil for planting vegetables in your home garden. Let’s explore- Pick the Right Time and Clear the Area Plan to prepare your garden soil a few weeks before planting (or in the fall prior). Avoid working the soil when it’s waterlogged; wait until it’s moist but not muddy​. Remove any weeds, grass, or old roots so you start with a clean bed. Loosen the Soil Deeply Use a shovel or garden fork to dig down about 8–12 inches and turn the soil over. Break up large clods of clay as you go. In small gardens, digging by hand works well; for larger areas, you might use a tiller. The goal is to loosen the soil so plant roots can penetrate easily. For extra-deep soil improvement, some gardeners practice “double digging” – digging out the first 12 inches of soil, loosening the layer below, then refilling. This can further improve root depth, though it is labor-intensive. Add Plenty of Organic Matter Spread a 2–4-inch layer of compost or well-rotted manure over the loosened soil, then mix it into the top 6–8 inches. Organic matter will enrich the soil and help it drain better. Compost is especially helpful for improving clay soil structure and providing nutrients​. You can also mix in bagged soil conditioner (finely ground bark) which many local gardeners use to help loosen clay. Test the Soil and Adjust if Needed Consider doing a soil test to check pH and nutrients (your local UGA Cooperative Extension office offers soil testing services). If the soil is too acidic (common in Georgia), mix in some garden lime to raise the pH toward about 6.0–6.5​. If it’s low in nutrients, add a balanced fertilizer according to recommendations. With plenty of compost, you may not need much additional fertilizer – don’t overdo it. Rake the Soil Smooth Rake the amended soil to break up any remaining clumps and to level the surface. A fine, even surface is especially helpful for planting seeds – small seeds like carrots germinate best in loose, clod-free soil​. Remove any rocks or debris you see. Now your garden bed is ready for planting! How to Prepare Soil for Planting Vegetables like Tomatoes, Cucumbers, and Carrots Different vegetables sometimes have special soil needs. Here are practical examples for preparing soil when planting tomatoes, cucumbers, and carrots in Atlanta gardens: Tomatoes Tomatoes – These popular plants are heavy feeders, so they love soil rich in organic matter. When preparing soil for tomatoes, mix in extra compost to ensure plenty of nutrients. Make sure the area drains well (raised beds or mounds can help if your ground soil stays soggy). Tomatoes prefer slightly acidic soil (around pH 6.5); if your soil is very acidic, a little lime can help prevent blossom-end rot (a fruit disorder)​. According to our 10 Tips for How to Grow Tomatoes at Home guide, starting with rich soil and keeping it evenly moist gives the best results. After planting your tomatoes, spread mulch on the soil surface to help keep that moisture in during hot Atlanta summers. Cucumbers Cucumbers – Cucumbers thrive in loose, fertile soil. Ensure your prepared soil is well-draining yet holds moisture – mixing in compost achieves both. Aim for a similar pH around 6 to 6.5 for cucumbers. Avoid waterlogged conditions, since cucumber roots can rot in standing water. After planting, apply mulch to keep the soil evenly moist and cool for the roots. For more growing pointers, see Cucumber Plant Growing Tips: Expert Advice on our site. Carrots Carrots – Carrots need extra well-prepared soil because their roots grow deep and straight. Remove all rocks and break up any hard clods in the planting area so the carrots won’t hit obstacles. You might mix a bit of sand into very clayey soil along with compost to help loosen it (or use a raised bed for carrots if your ground soil is too heavy). The soil should be fluffy and easy to dig at least 12 inches down. With soft soil, carrots will develop long, smooth roots. Harvesting is fun for kids when the carrots slip out easily from the loose earth! If your garden soil still isn’t ideal for carrots, try planting shorter varieties (like Nantes or Danvers Half-Long) or use deep containers filled with loose soil mix as an alternative.

How to Prepare Soil for Planting Vegetables Read More »