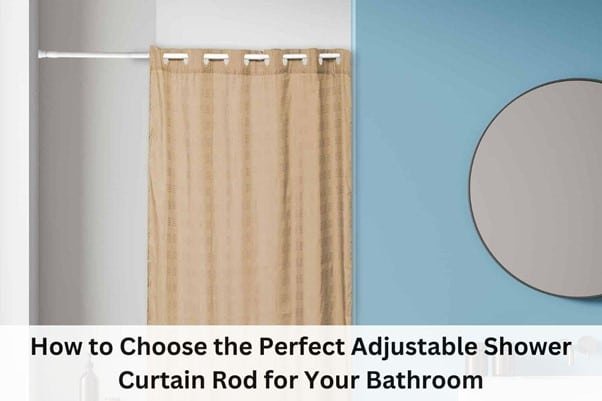
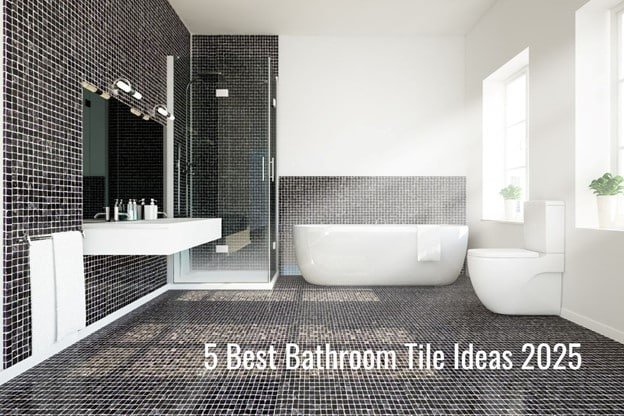
dreamhomeheaven.com

Cut watermelon into 2 pieces

How to Cut a Watermelon – Easy Way Cutting Tips

Cutting a watermelon doesn’t have to be difficult if you know the easiest way to cut a watermelon. Whether you prefer bite-sized cubes for easy snacking or classic triangles for serving, the right cutting technique makes all the difference. In this guide, we’ll show you how to cut a watermelon into cubes for convenience and how to cut a watermelon into triangles for a perfect handheld treat. Let’s make slicing effortless and mess-free! Beginner’s Guide: easiest way to cut a watermelon Summertime is a chance to enjoy cool snacks, and what is better than a juicy, ripe watermelon? Cutting a whole watermelon may look tough, but this simple guide shows you easiest way to cut a watermelon into bite-sized pieces. With a sturdy cutting board and some tips, you will feel confident enjoying this summer favorite in no time. “This article contains affiliate links. I might get commissions from those links if you click through the link and finalize a purchase. Please read Disclosure section for more information.” History of Watermelon Watermelon, scientifically known as Citrullus lanatus, has a rich and fascinating history that dates back thousands of years. Believed to have originated in the Kalahari Desert of Africa, watermelons were initially cultivated for their water content and ability to thrive in arid conditions. Ancient Egyptians are known to have cultivated watermelons as early as 2,000 BC, with evidence of the fruit found in hieroglyphics and burial tombs. The popularity of watermelons spread throughout the Mediterranean region and eventually reached Europe and other parts of the world through trade routes. In the 10th century, watermelons were introduced to China, where different varieties were developed to suit local tastes. Watermelons made their way to North America with European colonists in the 16th century and became a staple crop in Southern states due to their high water content and tolerance for hot climates. Today, watermelons are grown on every continent except Antarctica and are enjoyed around the world for their refreshing taste and nutritional benefits. In addition to being a delicious summer treat, watermelons are also packed with essential nutrients such as vitamins A and C, antioxidants like lycopene, and amino acids like citrulline. This juicy fruit continues to be a symbol of summertime refreshment and is celebrated in various cultures through festivals, recipes, and traditions. How to Cut a Watermelon into Cubes: Selecting the Perfect Watermelon Finding a good watermelon in grocery stores can be tough. But, you can use some easy tips to help you pick the right one. First, listen carefully! Tap the watermelon gently. If it makes a hollow sound, that means it is ripe. Next, check for a creamy yellow field spot. This shows that it ripened well on the vine. Stay away from any watermelons that have soft spots or bruises. A good watermelon will feel heavy for its size, which means it is juicy and sweet inside. Signs of Ripeness Knowing how to spot a ripe watermelon can make your summer snacks much better. Tapping a watermelon can create a satisfying hollow sound. But there are also visual clues to look for that show the melon is ripe and ready to eat. Focus on the field spot, which is the part where the watermelon sat on the ground while it grew. A ripe watermelon has a creamy yellow or buttery orange field spot. Try to avoid any watermelons with white or pale green spots, as these may not be ripe enough. Also, a slightly dull rind means the watermelon had enough time to ripen in the sun. The rind of a ripe watermelon should feel firm. You should not find any soft spots. By using these simple tips, you can pick a juicy and tasty watermelon for snacking. Avoiding Common Pitfalls When picking the best watermelon, avoid mistakes that can ruin your taste experience. First, don’t choose one with a very green rind. While the outside should mostly be green, if it looks too dark or bright green, it may not be ripe enough. Instead, look for watermelons with a slightly dull green rind that may have some yellow spots. This usually means it is ripe and ready to eat. Next, check the stem end of the uncut watermelon. The stem should be dry and brown, showing the melon ripened well on the vine. Finally, stay away from watermelons that have soft spots, bruises, or cracks on the rind. These flaws can change how the melon tastes and feels. Read more- How to Cut Onion like a Pro How to Cut a Watermelon into Triangles: Preparing Your Workstation Before you start cutting, make sure your workspace is safe and clean. First, choose a large cutting board that is big enough for your watermelon. This helps keep things stable and reduces mess. It’s also good to have a damp paper towel or cloth close by. You can use it to wipe any spills or sticky spots from the watermelon juice. A clean kitchen towel will be useful too. You can dry the watermelon after washing it and wipe your hands as you go. Necessary Tools and Equipment Before you start cutting your watermelon, get the right tools for a smooth and fun experience. First, make sure you have a large cutting board. This gives you plenty of space to cut and helps keep any juice from spilling. Next, you need a sharp knife. A sharp chef’s knife can slice through the watermelon rind and flesh easily. It makes clean cuts and lowers the chance of slipping, so it’s safer and faster. Finally, have some plastic wrap ready. You can use it to store any leftover watermelon. Plastic wrap keeps the fruit fresh and stops it from soaking up other smells in your fridge. Safety Tips for How to Cut a Watermelon While cutting a watermelon is easy, safety comes first. Start by putting your cutting board on a flat surface. This helps stop it from wobbling or slipping while you cut. Make sure to use

How to Cut a Watermelon – Easy Way Cutting Tips Read More »

Onion slice with knife and keep in a plate

Perfect Your Skills: How to Cut an Onion Guide

Knowing how to cut an onion the right way can save time and effort in the kitchen. If you love crispy onion rings, we’ll show you how to cut an onion into rings with ease. Tired of watery eyes? Don’t worry—we have tricks on how to cut an onion without crying. And for those who need perfectly even pieces, we’ll also cover how to cut an onion into slices or how to cut an onion into rings effortlessly. Get ready to chop onions like a chef! Beginner’s Guide: How to Cut an Onion into slices Perfectly Learning to cut an onion well is an important cooking skill. It can make your dishes taste much better. Whether you are new to cooking or want to improve your skills, this guide will help you. You will gain the knowledge and confidence to handle any recipe that uses onions. To cut onions safely and easily, you need a sharp knife and a strong cutting board. We will look at basic techniques like dicing onions for caramelized onions and some more advanced methods. Let’s discover how to cut an onion perfectly. “This article contains affiliate links. I might get commissions from those links if you click through the link and finalize a purchase. Please read Disclosure section for more information.” Understanding Onions: Varieties and Uses Onions are a common ingredient used in kitchens all over the world. They belong to the onion family and come in many flavors, colors, and sizes. Each type of onion adds its own taste and texture to a dish. This makes it very important to pick the right onion for your recipe. White onions have a strong, sharp flavor. They are great for making savory sauces and soups. On the other hand, Vidalia onions have a mild sweetness. They are often eaten raw in salads. Knowing the differences between these types of onions can really change how well your dish turns out. Types of Onions and Their Flavors Selecting the Right Onion for Your Recipe While some recipes need certain types of onions, knowing basic tips can help when you need to switch them out. For dishes that want a milder onion taste, like salad dressings or smooth sauces, white or sweet onions are the best way to go. Yellow onions are good for many different dishes. You can use them in soups and stews, or even caramelize them for toppings on burgers. They also work well for making onion rings if you slice them thick. If a recipe needs a lot of chopped onion, using a large Spanish onion can be timesaving. You can cut it in half and keep the other half for another time. Preparing How to Cut an Onion Without Crying Before you begin chopping, it’s important to gather the right tools and prepare your onion well. This can really help with safety and make your work easier. A bit of setup can lead to a better experience when you cut onions. Essential Tools and Equipment For How to Cut an Onion into Slices Proper Onion Storage Techniques Proper storage is very important for keeping your onions fresh and tasty. Whole onions should be kept in a cool, dry place with good air circulation. Keep them out of direct sunlight. Once you cut an onion, put it in an airtight container or wrap it tightly with plastic wrap. This helps stop it from drying out or taking on other smells in the refrigerator. To reduce odor from the onion, you can put it in the crisper drawer of the refrigerator. This drawer helps keep the right humidity. When you store a cut onion, make sure the cut side is facing down. This will help it stay fresh longer. Read more- How to Cut Watermelon: Beginner’s Guide The Beginner’s Guide How to Cut an Onion into Slices Now that you are ready, it is time to learn how to cut an onion. This simple guide will help you slice it evenly and make it easier to reduce tears. Make sure to keep your fingers safe and away from the knife while you cut. If you follow these easy steps, you can handle any onion recipe. Whether you are making a big stew or a light sauce, you will be ready. So, take your cutting board, sharpen your knife, and let’s start chopping. Step 1: Trim the Ends Place your onion on the cutting board. Use a sharp knife to cut off the stem end. Remove about half an inch from that end. Next, turn the onion around. Cut off the root end, also removing about half an inch. Removing both ends gives you a stable base for cutting. It also makes peeling the onion skin much easier. Be careful not to cut too deep into the root end. If you do, the onion could fall apart. Keep a bit of the root end intact. This will help hold the onion layers together while you slice. Now that you have trimmed the ends, you are ready for the next step. Step 2: How to Cut an Onion into Slices: Cut in Half and Peel Place the onion on one of its flat sides. This gives you stability while cutting. Carefully cut the onion in half lengthwise. Start from the stem end and cut through to the root end. Now, peel off the onion skin. It should come off easily, especially if you’ve trimmed the ends right. If some skin is still on, remove it gently with your fingers or the tip of your knife. Once you have peeled the onion, throw away the skin. Put the onion halves cut side down on your cutting board. You are now ready to slice or dice! Step 3: How to Cut an Onion into Slices Hold one half of the onion tightly with your non-dominant hand. Curl your fingers inward to stay safe. Place your knife straight up and down on the cutting board. Start making thin slices from

Perfect Your Skills: How to Cut an Onion Guide Read More »

Making Chicken kormas at pot

How to Make Chicken Korma Curry: Step by Step

If you love rich and creamy curries, learning how to make chicken korma is a must! This dish is packed with flavors from aromatic chicken korma ingredients like yogurt, nuts, and fragrant spices. Our korma chicken recipe is easy to follow, ensuring you get tender chicken in a luscious, flavorful sauce. Whether you’re cooking for a special occasion or a comforting meal, this guide will help you how to make chicken korma curry at home. Get ready to enjoy a restaurant-quality dish right from your kitchen! How to Make Chicken Korma Curry: Beginners Guide Among Indian cooking chicken Korma is everyone’s favorite dish. Chicken korma is rich and creamy with a great spice blend. It features juicy chicken in a rich gravy. Also, you need to add garam masala, yogurt, nuts and occasionally a spoonful of coconut milk. This article is a step-by-step guide about how to make Chicken Korma curry for both expert chefs and beginners cooking for the first time. “This article contains affiliate links. I might get commissions from those links if you click through the link and finalize a purchase. Please read Disclosure section for more information.” Understanding How to Make Chicken Korma Curry Chicken Korma is a unique dish in the wide range of Indian curries. It has a mild flavor and a smooth texture. Unlike othercurries that can be very spicy, Chicken Korma combines fragrant spices with a creamy sauce. This makes it both cozy and fancy. Even though it has a rich taste, Chicken Korma is easy to make for anyone. The ingredients are easy to find, and the cooking steps are clear. This makes it a great option for weeknight meals or special events. The History and Origin of Chicken Korma Chicken Korma’s history goes back to the Mughal era in India, around the 16th century. This dish likely started in the royal kitchens of the Mughal emperors. They were famous for their grand feasts and rich meals. This tasty and creamy curry was usually served during special events and for important guests. It showed off the luxury and greatness of the Mughal court. The word “korma” is derived from the Urdu word “korma,” meaning “to braise.” This is how the dish was prepared. Chicken Korma is still very famous in India also loved across the world. It’s an increasingly common presence on the menus of many Indian restaurants and curry houses. Its enduring popularity lies in its precise balance of flavors and textures, which is a hallmark of all of Indian food. Why Chicken Korma is a Beloved Dish in Indian Cuisine Chicken Korma is a favorite dish in Indian food. People love it for its rich flavor and creamy texture. This great taste comes from a mix of special spices and rich ingredients. Garam masala is one important spice in Indian recipes. It adds warmth and depth. The yogurt and nuts used in the dish also make a smooth and tasty sauce. One reason Chicken Korma is so popular is because it can be changed to fit personal tastes and diets. You can change how spicy it is. There are also vegetarian options, where you can use vegetables or paneer instead of chicken. These are just as tasty. Whether it’s for a family dinner or a special event, Chicken Korma is a must-have. It stays a beloved choice in Indian cooking traditions. Preparing How to Make Chicken Korma Curry Before you start cooking Chicken Korma, it’s important to gather the right ingredients and tools. This will make cooking easier and let you enjoy making this tasty Indian dish. You need key spices and the right kind of chicken for the best results. Having everything ready helps your cooking experience be fun and satisfying. Now, let’s look at what you need for a truly authentic and delicious Chicken Korma. Essential Ingredients for Authentic Korma Chicken Recipe Chicken Korma is a flavorful and aromatic dish that requires a blend of various spices and ingredients to achieve its rich taste. To make Chicken Korma, you will need the following chicken korma ingredients along with their respective amounts: These ingredients come together to create a creamy and indulgent Chicken Korma that is sure to delight your taste buds with its complex flavors and tender chicken pieces in a luscious sauce. As I always say, the key to a delicious Chicken Korma is in selecting the right ingredients. The mix of ingredients, of course, will vary based on location and tastes, but some main ones will always be in the mix. Garam masala, a blend of ground spices, provides the overpowering aroma and flavor of the korma. Ground almonds are key, as well: They thicken the curry and give it a nutty flavor. Whole spices, such as cardamom pods, sticks of cinnamon and cloves, give the dish warmth and subtlety. Apart from these core ingredients, yogurt, cream or coconut milk, onions, ginger, garlic, and green chilies do their magic in giving Chicken Korma a such creamy texture and a balanced flavor. Selecting the Right Type of Chicken The chicken you choose can alter the direction of your Chicken Korma. Bone-in chicken thighs provide more flavor, while boneless chicken breast cooks quicker and is leaner. This recipe works best with boneless chicken, such as breast or thigh meat, that’s been cooked in olive oil. It cooks quickly and absorbs the flavors of the korma sauce nicely. If using chicken breast, dice into small cubes. That allows it to cook through evenly and soak up the creamy korma sauce. Bone-in chunks of chicken are delicious, but they require longer cooking time to be fully cooked. Ultimately, your decision depends on your preferences and the amount of time on your hands. But regardless of what kind you use, some good, fresh chicken will definitely make your chicken curry taste so much better. Kitchen Tools and Equipment Needed for How to Make Chicken Korma Curry You don’t need a swanky kitchen to make delicious Chicken Korma. But the right tools can help make it easier and more enjoyable. You do not need a food processor, but it makes a huge difference. It can assist in getting a

How to Make Chicken Korma Curry: Step by Step Read More »

Chicken Biriyani at plate with potatoes, rice and chicken

How to Make Chicken Biryani at Home: Step By Step Guide

Craving a delicious homemade meal? Our chicken biryani recipe is packed with aromatic spices, tender chicken, and perfectly cooked basmati rice. If you’re looking for a simple chicken biryani recipe, this step-by-step guide will help you recreate the authentic taste effortlessly. Follow along and discover how to make chicken biryani at home that’s rich, fragrant, and absolutely irresistible! Master the Art: How to Make Chicken Biryani at Home Indian food can never be the fulfill if chicken biryani is not added to its list. It is easier to prepare than many think. This guide will equip you with all the information to make a good Hyderabadi biryani recipe at home. You need to review its past, simple step-by-step directions, and useful tips. Let’s explore our article how to make chicken biryani at home step by step. “This article contains affiliate links. I might get commissions from those links if you click through the link and finalize a purchase. Please read Disclosure section for more information.” Understanding How to Make Chicken Biryani at Home: A Culinary Journey Biryani is not just a meal; it’s a blend of many tastes, textures, and smells. Every part of biryani matters. The fluffy basmati rice, the soft marinated meat, and the mix of spices all work together. But biryani is more than its rich taste. It also has a deep history and meaning that makes it special. Biryani started many years ago. It crossed many borders and changed into many different styles, each with its own unique touch. This rich history keeps attracting food lovers everywhere, making biryani a true work of culinary art. The Origins of Biryani Biryani’s exact start is hard to pin down, but many food experts think it began in Persia or Central Asia. Then, it likely made its way to India. Some say Mughal invaders brought it in the 16th century. Others believe Persian traders introduced it before that time. No matter where it started, biryani quickly became popular in India. It changed from a dish for kings to a favorite for all kinds of people. Its ability to mix in local flavors led to the many different styles we enjoy today. The key components of biryani — aromatic rice, tender meat, a blend of whole spices and herbs — have not changed that much over time. All these spices are beautifully blended with fried onion and fresh herbs such as mint leaves to give a unique taste. This has astonished eaters for decades. Types of Biryani: From Hyderabadi to Kolkata Hyderabadi biryani is famous for its strong flavors and spicy taste. It is very popular in Southern India. It is a biryani with meat that has been marinated in yogurt, saffron rice and generous amounts of whole spices. These add richness and fragrance to the dish. Get Kolkata biryani if you visit the north. If you go to the north, you will find Kolkata biryani. This type is known for its light sweetness and often has potatoes and boiled eggs. It uses fewer tomatoes and red chilies than the southern types. This makes it milder, which many people in the east enjoy. With some searching, you can find various kinds of tasty biryani in Indian stores in the United States. Whatever its kind, biryani is a flavored dish that takes your palate on a journey. Essential Ingredients for How to Make Chicken Biryani at Home Let’s dig in how to make chicken biryani at home. Making a real chicken biryani starts with picking the right ingredients. You need fresh and good quality spices. These spices are very important for this dish. Simple Chicken Biryani Recipe Ingredients Biryani Masala Powder adds flavor to the ideal biryani. This is a list of spices you can use and amounts to create your own homemade Biryani Masala Powder: Key Spices for the Authentic Flavor The fragrant smell and flavor of biryani comes from a combination of spices. Garam masala is the main Indian spice blend that provides the base. Look for premade mixes or make your own with a recipe for a personalized experience. Biryani masala, specifically prepared for this, enhances not only taste but also aroma. If you can’t find it, you can substitute garam masala powder instead for similar results. Red chili powder gives it some spice, so adjust your quantity depending on how spicy hot you go. Turmeric powder adds a warm flavor and gives the rice a bright yellow color, making it look nice. To get stronger flavors, lightly roast whole spices before grinding them. This way, you bring out their great smell and taste even more. The rice and chicken you choose are also key. Use aged basmati rice for a fluffy texture. Select tender and tasty cuts of chicken for the best results. By choosing quality ingredients, you’re getting ready for a biryani that is full of flavor. Choosing the Right Rice and Chicken Choosing the right rice for your biryani is very important. Aged basmati rice is the best choice. It has long grains, a nice smell, and cooks up fluffy. This makes it perfect for biryani. Chicken thighs are great for biryani, but chicken breasts are leaner. Bone-in chicken thighs remain juicy and tender while cooking. They also add great flavor to the rice. You should get chicken thighs from your local butcher. It is best to choose free-range or organic chicken when you can. Good ingredients make a big difference in your biryani. Read more- How to cook chicken korma at home Preparing Your Kitchen for Simple Chicken Biryani Recipe Setting up your kitchen is an integral part of preparing biryani. Getting the right tools and keeping things neat helps with an easy rhythm for cooking. When you gather everything, you need ahead of time, you can pay attention to each step. This makes the whole experience more fun. Must-Have Cooking Equipment A large pot or Dutch oven is very important for making biryani. It gives enough space to layer and cook the ingredients just right. A heavy-bottomed pot helps heat spread evenly. This stops food from sticking and makes sure everything cooks well. Most people make biryani

How to Make Chicken Biryani at Home: Step By Step Guide Read More »

pexels-photo-17050967-17050967.jpg

Cucumber Plant Growing Tips: Expert Advice

Cucumbers are a great addition to any home garden, but knowing how to plant cucumber plants correctly is key to a successful harvest. Whether you’re a beginner or an experienced gardener, understanding how to grow cucumber the right way ensures healthy growth. With the right care and environment, cucumbers can thrive and produce abundantly. Follow these essential cucumber plant growing tips and discover the best tips to grow cucumbers for a fresh, homegrown supply all season long. Top advice: Cucumber Plant Growing Tips There’s really nothing like the crunch of a fresh, homegrown cucumber. In salads, while pickling, or just fresh, cucumbers are a great addition to any garden. With understanding the basics of growing cucumbers, including when to plant your cucumber seeds and how to help the pollination of the female flowers, you can increase your chances of success. By using the tips from this guide and preparing for the last frost, you will be set for a great harvest. Let’s explore cucumber plant growing tips: expert advice and know how to grow cucumber. “This article contains affiliate links. I might get commissions from those links if you click through the link and finalize a purchase. Please read Disclosure section for more information.” Key Highlights of Tips to Grow Cucumbers Understanding the Basics of Plant Cucumber Plants Cucumbers, known scientifically as Cucumis sativus, are vegetables that do best when it’s warm, particularly in temperatures between 70-85°F (21-29°C). With the right care, they are pretty simple to grow. However, there are some important things to remember for a successful harvest. For instance, providing good sunlight, making sure the soil drains well, and keeping moisture at a steady level are necessary. By understanding these cucumber plant growing tips about basic needs, you help your cucumber plants to flourish. By focusing on these elements from the start, you create a perfect place for your plants to grow strong and yield lots of fresh, tasty cucumbers. The Right Time to Plant Cucumbers in the US Planting your cucumbers at the right time is really important for them to grow well. With heat-loving plants like these, you should plant them about 2-3 weeks after the last frost date in your area. By doing this, you make sure that the soil temperature stays warm enough for germination and you reduce the danger of frost from hurting the young seedlings. Before planting, make sure that your soil temperature is at least 65°F (18°C). You can check this with a soil thermometer to be more accurate. Planting in cold soil can cause bad germination rates and slow growth, so it’s important to be patient. I use Urban Worm Soil Thermometer for checking soil temperature for my home garden. It is only $10 and more than 7000, 5-star ratings at Amazon. Also, I have Soil Moisture Meter Digital Plant Temperature device. By using this device, you will be able to measure the soil’s moisture content, pH, temperature, and amount of sunshine reaching the plants. That’s cucumber plant growing tips helps you know when you need to water your plants. Keep in mind that cucumbers don’t like cold temperatures very much. Therefore, if you’re unsure, it’s generally a good idea to wait a little longer before you plant. Selecting the Perfect Location for Plant Cucumber Plants Choosing a good place for your cucumber plants is very important step for how to grow cucumber, getting a lot of cucumbers and helping them grow up strong. In your vegetable garden, you should pick a spot that gets at least 6-8 hours of full sun each day. About sunlight and warmth, cucumbers really need both to grow well, so having enough light is very important. Also, make sure that your garden soil drains well and has good nutrients. Cucumber plants like soil that is a little acidic to neutral, with a pH between 6.0 and 7.0. If your soil is too heavy or made of clay, you might want to add organic matter such as compost or peat moss to help it drain better. By picking the right place in your garden, you can make sure your cucumber plants have the best chances to grow big and give you lots of fresh, tasty cucumbers. Preparing the Soil – Tips to Grow Cucumbers To prepare your garden soil before planting, it’s really important for giving your cucumber plants a good start. First, remove any weeds or trash from the area where you’ll plant. After that, loosen the soil to about 12 inches deep using a garden fork or tiller. By doing this, you not only help with drainage but also make it easier for the roots to go into the soil and find important nutrients. Adding a layer of compost or well-rotted manure is a great idea. It helps add vital nutrients to the soil and improves its overall structure, making the perfect place for your cucumbers to grow. Essential Soil Nutrients for Healthy Growth Cucumbers grow well in fertile soil that has a lot of organic matter. Before you start planting, mix your soil with plenty of compost or well-rotted manure. With these additions, you not only give important nutrients but also make the soil better for growing and help with drainage. For my home garden, I use Miracle-Gro Organic Raised Bed & Garden Soil. It is the best soil fertilizer. You have to feed 2 months your vegetables for getting better plants. Also, you can buy Miracle-Gro Water Soluble Plant Food Vegetables & Herbs. It works well for tomatoes, squash, peppers, cucumbers, carrots, basil, and other herbs and vegetables. Miracle-Gro Water Soluble Plant Food Vegetables and Herbs From compost and manure, helpful microorganisms are introduced. These tiny helpers break down organic matter, making nutrients easier for your cucumber plants to use. This steady flow of nutrients is vital for promoting strong growth and good fruit production. Tips to Grow Cucumbers: Adjusting Soil pH for Optimal Results Cucumbers are flexible, but they like soil that is slightly acidic to neutral, with

Cucumber Plant Growing Tips: Expert Advice Read More »

Sofa set on carpet with furniture pads

Easy Solutions: How to Avoid Furniture Marks on Carpet

How to avoid furniture marks on carpet is a common concern for homeowners who want to maintain a flawless floor. Heavy furniture can leave unsightly dents, but with simple preventive measures, you can keep your carpet looking new. If you already have indentations, don’t worry—there are easy ways to remove furniture marks on carpet using ice cubes, steam, or a vacuum. Wondering, how do you remove furniture marks from carpet effectively? Keep reading for practical tips to restore your carpet’s smooth and even texture. How to Avoid Furniture Marks on Carpet: Quick Tips There’s really no feeling like having soft, new carpet beneath your feet. Yet, that fresh appearance can easily get spoiled by the dents and indents caused by heavy furniture. From a sofa to an armchair, even a big coffee table, those furniture legs can put a lot of pressure on carpet fibers, creating ugly marks. In this useful guide, you will find practical ways to stop furniture marks on your carpet, ensuring it stays looking great for a longer time. “This article contains affiliate links. I might get commissions from those links if you click through the link and finalize a purchase. Please read Disclosure section for more information.” Understanding How Do You Remove Furniture Marks From Carpet Furniture marks on carpets can look like little dents or presses. They happen because of the constant pressure from the weight of the furniture on the carpet fibers. With time, this pressure squashes the fibers flatter and makes them less springy, so you can really see the marks, especially on softer carpets or those with a higher pile. Besides just looking bad, these marks can also catch dirt and debris, which makes cleaning harder. In really bad situations, if the compression goes on too long, it might even cause permanent damage to the carpet fibres, hurting the carpet’s lifespan and how it looks overall. Learning how to avoid furniture marks on carpet helps maintain its smooth and fresh appearance. And using furniture pads is an effective way on how to avoid furniture marks on carpet The Basics of How Furniture Can Damage Carpets The weight of the furniture, especially when it’s pushed down on small areas like chair or table legs, squishes the carpet fibres. With this ongoing pressure, the fibres can lose their natural bounce and ability to spring back. For example, think about stepping on a piece of grass over and over – it will eventually flop over and can’t stand back up. How much damage happens depends on different things. More weight from heavy furniture puts harder pressure. Furthermore, the type of carpet material and how it is made are also important. Carpet made of delicate natural fibers, like wool, may get compressed more easily compared to synthetic carpets. On the bright side, it is possible to lessen this damage. Using furniture pads allows the weight to spread out better, which lightens the pressure on certain spots. I use Yelanon Felt Furniture Pads for my home. The cost of 128 furniture pads is around $10. These furniture pads shield carpet from damage and are quite simple to use. You can prevent carpet damage in your house by using Yelanon Furniture Pads. On Amazon, this product has received over 10,000 5-star ratings. Different Types of Carpet Marks Carpet marks usually happen because of furniture, and they come in different forms. The most common ones are dents or compression marks. These marks show up as flattened spots where furniture legs press down continually, smashing the carpet fibers and making unsightly indentations. The amount of damage can go from hardly visible to really noticeable, based on the weight of furniture and how long it stays in one place. Another kind of mark is called “pooling” or “crushing.” With time, this develops from foot traffic and furniture weight, which causes the carpet fibers to bend in different ways. While pooling may not leave dents, it changes how the carpet looks overall. It might appear worn and uneven, especially in areas with lots of foot traffic. By knowing about these various types of carpet marks, you can take the right steps to prevent them and use the best cleaning methods to keep your carpet looking great. How Much Cost Avoid Furniture Marks Many people think about getting rid of furniture marks, but it’s actually cheaper and quicker to stop them before they happen. Using proactive steps can help you avoid the costs of professional carpet cleaning, repairs, or even having to replace your carpet too soon. It might cost you around $100 to $250 for keeping your carpet clean in a year. If you have lot of furniture’s in your home, then cost might be little more. But overall, it will not cost you too much money. You can use simple and affordable solutions, like caster cups or furniture coasters. With rotating your furniture regularly and placing area rugs in busy spots, you can really reduce the chances of those annoying dents and marks on your carpet. By taking these preventative actions, you can protect your investment and make your carpet last longer while keeping it looking good. Pre-Installation Tips to Remove Furniture Marks on Carpet Before any furniture touches your new carpet, follow these simple steps to prevent indentations. By thinking about these things before you install it, you can help your carpet endure for a long time while showing less damage. With the selection of the right carpet type and padding, along with careful planning of your furniture arrangement, you’ll support a floor that stays looking nice for a longer time. Choosing the Right Carpet Type and Padding The kind of carpet material you select can really affect how easily it gets marked by furniture. For this reason, choose carpets with low pile and a dense build. They usually stand up better and bounce back from compression more effectively. For color, think about using solution-dyed carpets, as the color goes all the way through the fiber. This feature

Easy Solutions: How to Avoid Furniture Marks on Carpet Read More »

Growing Vegetable Plants Indoors: Avoid Common Mistakes

Growing Vegetable Plants Indoors: Avoid Common Mistakes

Growing vegetables indoors for beginners is a great way to enjoy fresh produce year-round, even without a backyard. With the right setup, you can start growing vegetable plants indoors using containers, proper lighting, and nutrient-rich soil. Choosing the best indoor vegetable plants like lettuce, herbs, and cherry tomatoes will help ensure a successful indoor garden. Get ready to transform your space into a mini farm with these simple yet effective tips! Growing indoor vegetable plants: Tips for avoiding Common Mistakes Indoor gardening gives you the chance to grow your favorite vegetables all year, no matter how much space you have. It doesn’t matter if you’re a seasoned gardener or just beginning; this detailed guide is here to help. We’ll walk through choosing the best spot for your plants, setting up a grow light, and picking out the right potting mix for optimal growth among other things. With these tips, creating a thriving indoor vegetable garden will be easy. “This article contains affiliate links. I might get commissions from those links if you click through the link and finalize a purchase. Please read Disclosure section for more information.” Understanding Indoor Vegetable Gardening Basics You’re tasting the fresh flavors of vegetables that were just picked from your own kitchen! With indoor vegetable gardening, you can have homegrown veggies any time, no matter what the weather’s like outside. However, it’s really important to understand how to grow plants inside before getting started. With indoor vegetable gardening being different from outdoor gardening, you need to make sure everything is just right for your plants indoors. This means giving them enough light, making sure there’s good air flow around them and keeping the temperature and humidity at levels they like. Why Grow Indoor Vegetable Plants? Having a small garden space or dealing with long winters shouldn’t stop you from growing vegetable plants indoors. With indoor vegetable gardening, you can easily grow fresh food right at home, avoiding the need to constantly buy produce from the grocery store. This way, you’re in charge of what goes on your plate and get to enjoy the rewards of your hard work. By growing your own food, you depend less on supermarkets. It’s a smart move that can save money and is better for the planet too. Think about how great it feels to eat vegetables that you know exactly where they came from and how they were grown. On top of all this, indoor gardening means you can grow lots of different veggies, even those that usually wouldn’t thrive in your area’s weather. So why not turn your place into a lush spot full of tasty veggies with an indoor vegetable garden? Key Benefits of Growing Vegetable Plants Indoors With indoor vegetable gardening, you get to enjoy a big plus: your growing season gets a lot longer. Think about it – having fresh salad greens like lettuce and spinach all year round! By growing vegetable plants indoors, you can make sure everything’s just right for your plants – the light, water, and food they need. This way, they grow up healthier and might even give you more than if they were outside. On top of that, when you grow vegetables inside, you don’t have to worry as much about bugs or sicknesses that outdoor plants often face. So there’s less need to use chemicals on them. That means the food from your garden is not only better for you but also kinder to our planet. 5 best Vegetables to Growing Vegetables Indoors for Beginners Growing vegetables plants indoors is a convenient and rewarding way to enjoy fresh produce year-round. Here are five of the best vegetables to grow indoors: 1. TOMATOES Light: Tomatoes require ample sunlight to thrive. If you are growing them indoors, ensure they receive at least 6-8 hours of direct sunlight daily. In the absence of natural light, you can use grow lights specifically designed for plants to supplement their light requirements. Water: Proper watering is crucial for tomato plants as both overwatering and underwatering can harm them. Keep the soil consistently moist but not waterlogged. It’s best to water the plants at the base to avoid wetting the foliage, which can lead to diseases. Ventilation: Good air circulation is important for preventing fungal diseases and ensuring healthy growth. Place fans near your tomato plants to improve air circulation. Additionally, opening windows or using exhaust fans can help maintain proper ventilation levels. 2. HERBS (BASIL, MINT, PARSLEY) Herbs are easy to grow indoors and can add flavor to your dishes. Basil, mint, and parsley are among the most popular choices due to their culinary uses. Light: To successfully grow herbs indoors, it is crucial to provide the optimal conditions for their growth. Herbs generally thrive in temperatures ranging from 60°F to 70°F (15°C to 21°C). Water: Consistent watering is essential for their development; however, it’s important not to overwater as this can lead to root rot. Ventilation: Adequate air circulation helps maintain a healthy environment for indoor herb growth. Additionally, positioning your indoor herb garden near a window that receives ample sunlight or using grow lights can help ensure that the herbs receive sufficient light for photosynthesis. 3. MICROGREENS Microgreens are nutrient-dense young vegetable greens that are harvested soon after germination. They are packed with flavor and nutrients, making them a healthy addition to salads and sandwiches. Light: Microgreens generally thrive in temperatures ranging from 60 to 70 degrees Fahrenheit (15-21 degrees Celsius). Consistent temperature control is essential for their growth and development. Water: When it comes to watering microgreens, it’s important to keep the soil consistently moist but not waterlogged. Overwatering can lead to mold growth and root rot. A good practice is to water them from the bottom using a tray filled with water to prevent disturbing the delicate seedlings. Ventilation: Proper ventilation is necessary to prevent the buildup of humidity, which can also contribute to mold or mildew issues. Good air circulation helps in strengthening the stems of the microgreens and

Growing Vegetable Plants Indoors: Avoid Common Mistakes Read More »

How to Clean Carpet Without Machine: Home Cleaning Tips

How to Clean Carpet Without Machine: Home Cleaning Tips

Learn how to clean carpet without machine at home with our easy tips. Discover how to clean a carpet without vacuum and how to clean carpet without shampooer at home efficiently. Home Cleaning Hacks: How to Clean Carpet Without Machine You don’t need fancy machines or strong chemicals to get your carpets looking great. With this detailed guide, you’ll learn how to clean carpet without machine using easy-to-make, environmentally friendly mixtures. It walks you through each step of cleaning carpets by hand, helping you remove stains and smells easily and keep your house feeling welcoming without relying on harsh chemicals for carpet cleaning. “This article contains affiliate links. I might get commissions from those links if you click through the link and finalize a purchase. Please read Disclosure section for more information.” Preparing Your Carpet for How to Clean a Carpet Without Vacuum To get started with carpet cleaning, it’s important to first clear the space. Move any furniture or items off the carpet so you can easily reach every part without bumping into anything. This step helps avoid any unintended harm while cleaning. After that, give your carpet a good once-over with a vacuum cleaner that has strong suction. By doing this, you pick up all the loose dirt, dust, and bits lying around on the surface. Make sure to focus on areas that see a lot of foot traffic and those tricky corners where dirt loves to hide. Identifying the Type of Carpet and Stains Carpets come in all sorts of materials, and each type needs a different way to clean it. To start off right, find out what your carpet is made from by looking at the tag from the maker or doing a quick search online. Knowing this will help you pick the right stuff to clean it without messing up its fibers. On top of that, figuring out what kind of mess you’re dealing with on your carpet matters a lot for getting rid of it properly. Stains can be either something like coffee spills which are water-based and usually easier to tackle, or tougher ones like grease or ink that are oil-based and need special cleaners. By knowing both the type of carpet and stain, you can choose how best to clean up without making things worse or hurting your carpet. Essential Tools and Ingredients for DIY How to Clean Carpet Without Shampooer To get your carpet looking spotless without using a machine, make sure you have these key items on hand: By having all these things ready to go, you’re all set up with everything necessary for tackling different kinds of messes in your carpets and know how to clean carpet without machine. Ingredients Price and Link Buying from Amazon BAKING SODA If you want to know how to clean carpet without shampooer, here’s the solution: ARM & HAMMER Baking Soda– Price $8, 2.7 lb Arm & Hammer Baking Soda Shaker, 12 Oz- Price $16, 6 packs WHITE VINEGAR Iberia All-Natural Distilled White Vinegar– Price $12, 1 gallon Aunt Fannie’s Extra Strength Cleaning Vinegar– Price $14, 32-ounce, multi-purpose cleaner. DISH SOAP Botanicals Plant-Based Liquid Dish Soap– Price $20, 1 gallon Palmolive Ultra Dishwashing Liquid Dish Soap– Price $4.65, 32.5 fluid ounce SPRAY BOTTLE Plastic Spray Bottle 2 Pack– Price $7, 2 packs Plastic Spray Bottle 4 Pack– Price $12, 16 oz or 500 ml spray bottle CLEANING CLOTH Microfiber Cleaning Cloth– Price $8, 12 packs FIXSMITH Microfiber Cleaning Cloth, Rags– Price $18, 5 colors, 50 packs SCRUB BRUSH Bristle Carpet Cleaning Scrub Brush– Price $7.55 Deep Cleaning Supplies Scrub Brushes– Price $22.49 PHYEX 2-Pack Large & Small Cleaning Brushes– Price $9, 2 packs Scrub Brush Floor Brush with Long Handle– Price $17; long handle brush perfect for cleaning your carpet. Step-by-Step Guide How to Clean a Carpet Without Vacuum With your cleaning gear all set, here’s how to tackle a full carpet clean: Vacuuming: The First Step How to Clean Carpet Without Machine Many wonder how to clean a carpet without vacuum. But vacuuming is a must-do step when taking care of your carpets, whether you’re doing a big clean or just keeping up with the usual upkeep. Before you start any kind of wet cleaning, always make sure to vacuum the whole carpet first. With a vacuum cleaner that has good suction power, you can get rid of all sorts of things like loose dirt, dust, pet hair, and other stuff stuck in the carpet fibers. You’d be surprised by how much dirt comes out during this process. It really shows why vacuuming is key for keeping your home clean and healthy. By regularly running the vacuum over your carpet not only makes it look better but also helps it last longer. This happens because it stops dirt from getting pushed down deep into the fabric where it can harm the fibers as time goes on. Stain Removal Techniques for Immediate Action When you spill something, it’s super important to clean it up fast. The sooner you tackle a stain, the better your chances are of getting rid of it before it sinks deep into your carpet. Start by dabbing the spot with a paper towel or a fresh cloth to soak up as much liquid as you can. For those harder-to-remove spots, mixing white vinegar and dish soap works wonders. Just take equal parts of white vinegar and warm water in a spray bottle, then add some dish soap drops into the mix. Spray this homemade cleaning solution on the stained area and pat dry with another clean cloth from outside towards the middle. It’s crucial not to rub or scrub at the stain because that could make things worse by spreading it around or harming your carpet fibers. Read more- How to Avoid Furniture Marks on Carpet Homemade Carpet Cleaning Solutions One great thing about cleaning your carpet by hand is that you can use safe, natural stuff from around the house. These homemade mixtures are not only kind

How to Clean Carpet Without Machine: Home Cleaning Tips Read More »

How to Organize Clothes at Home

How to Organize Clothes for a Neat and Tidy Closet

In the hustle and bustle of daily life, maintaining an organized home can sometimes fall by the wayside—especially when it comes to our wardrobes. Clothes pile up, closets become chaotic, and suddenly, finding that one shirt becomes a 15-minute ordeal. However, organizing clothes at home doesn’t just reclaim your space; it reclaims your peace of mind. Whether you’re a home organizer, a fashion enthusiast, or a busy parent, this guide is crafted with you in mind. Let’s explore how to organize clothes in a closet with these closet organization tips? How to Organize Clothes at Home: Step by Step Guidelines “This article contains affiliate links. I might get commissions from those links if you click through the link and finalize a purchase. Please read Disclosure section for more information.” The Benefits of Knowing How to Organize Clothes in A Closet First, it’s important to understand the ‘why’ behind the effort. Organizing your clothes saves precious time in the morning, reduces clutter, and can have a surprisingly positive effect on your mental health. As Marie Kondo famously said, “The goal of tidying is to make room for meaningful objects, people, and experiences.” Sorting and Decluttering Tips How to Organize Clothes in A Small Space Let’s talk about how to organize clothes in a closet. The first step in organizing is sorting and decluttering. Peter Walsh notes, “Clutter is not just the stuff on your floor – it’s anything that stands between you and the life you want to be living.” Start by categorizing your clothes and deciding what to keep, donate, or toss. Remember, seasonal rotation can help manage space effectively and keep your wardrobe in sync with the weather. Storage Solutions When it comes to storage, there’s no one-size-fits-all solution. Different types of clothing require different storage options. Emily Ley reminds us, “Simplicity isn’t about being a minimalist, but about making room for what matters most.” Maximize closet space with multi-use hangers, utilize under-the-bed storage for out-of-season items, and consider a capsule wardrobe to streamline your daily choices. How to Organize Clothes at Home- Step by Step Empty Your Closets and Wardrobe First At the beginning, you need to clean your wardrobe and closets. That will help you to know how much space you have and how you can organize all clothes in an order. Keep all new and old clothes in another room. Then, find out which clothes you do not want to use anymore. Put those clothes in a container. Usually, I use Amazon Basics Collapsible Fabric Storage Cube Organizer. It’s came out with 6 storage containers, that help me for storing, organizing, and reducing clutter. I usually use 4 containers at a time for 4 different purposes. Those 4 categories are donated, sell, trash and storage. I usually do that every 3 months for getting idea which clothes I can use and rest I can give it away. Organize Clothes by Category Next step, you need to separate your wardrobe by shoes, inner clothes, outer clothes, everyday essential clothes, summer clothes, winter clothes. This process is really helpful for getting idea how much space you need for your shoes, summer clothes, winter clothes and others. When you finish this step, you will get you almost done majority of your work. Next step, we need to buy some clothes container for keeping those categorized clothes. Buy Storage Container and Other Accessories Usually, I buy all of my cloth container from amazon. You can buy 6 Pack Clothes Storage Bins Foldable Closet Organizers. That will help you to storage 6 different kinds of clothes. Before buying those containers, you must need to make sure your wardrobe size and those containers size is same, so that you can just put those containers in your wardrobe drawers. Also, I brought Under Bed Storage Containers. The storage containers’ huge transparent view makes it easier for you to quickly find and retrieve the things you need. Also, you have to buy some hangers for your home. Let’s check it out- Magic Pants Hangers Space Saving – 2 Pack for Closet  MORALVE Pants Hangers Space Saving Closet Organizers and Storage,3 Pack Organization Keep Clothes in Storage Containers and Hangers After buying all storage containers and hangers, now you need to keep all clothes in containers and hangers according to the categories like shirt, pants, summer cloths, winter cloths, evening cloths and others. When, you done everything, then you need to make sure one more time, everything is perfect. Organize Shoes in a Rack Different kinds of shoe racks are available for organizing shoes at home. If you have a big family, you can buy 6-Tier Foldable Shoe Rack Organizer for Closet 24Pairs. This rack is very fashionable and easy to move around the house. Also, if you like transparent shoe rack, you can buy Plastic Shoe Organizer from amazon. Its longevity is assured by the thick plastic sheet, and its transparent form makes it easy to quickly identify the shoes you plan to wear today. In addition, I see many people use Bamboo Shoe Rack Stackable Shoe Shelf Storage for its strong load-bearing capacity, sturdiness and durability. Regular Inspection After organizing everything, you need to inspect your wardrobe and closets every 3 months later. If you see wardrobe and closets are not organized after 3 months, then you have to follow all of those steps again. Read more from our website: How to Choose Curtains for your Home Real-Life Success Stories The Busy Parent By adopting the KonMari method, a parent of three turned their cluttered wardrobe into a streamlined, joy-sparking space. This not only made mornings smoother but also taught their children the value of keeping spaces tidy. The Fashion Enthusiast A lover of fashion faced the challenge of storing an extensive collection. Through seasonal rotation and innovative storage solutions, they were able to keep their collection accessible and in pristine condition. The Minimalist This is the best solution for how to organize clothes in a small space. One individual’s decision to

How to Organize Clothes for a Neat and Tidy Closet Read More »

Peaceful bedroom with balcony view, perfect for relaxation representing that How to Choose Right Curtains for My Home?

How to Choose Curtains for Home? Experts Tips

Curtains are essential in our home. They protect our privacy and increase beauty of the home. Let’s explore article on how to choose curtains for living room and how to choose curtains for home. How to Choose Curtains for Home? Experts Tips Curtains aren’t just pieces of fabric you hang on your windows. They are the soul of a room, establishing the vibe, manipulating the light and, yes, affecting how you feel. Whether you’re a homeowner, a budding interior design aficionado, a DIYer, knowing how to select the correct curtains can elevate your space from bland to fabulous. In this detailed guide, we shall lead you through the process, from getting to know the basics to executing the most artistic ideas in your home. Let’s explore our article to learn how to choose curtains for living room and home. “This article contains affiliate links. I might get commissions from those links if you click through the link and finalize a purchase. Please read Disclosure section for more information.” Understanding the Importance of Curtains Curtains give privacy, screening interiors from prying eyes, which is necessary for both residential and commercial settings. They also help control natural light, meaning you can reduce the influx of sunshine into a room to reduce glare and protect furniture from the damaging effects of UV light. And curtains save energy by providing insulation, which keeps rooms warm in the winter and cool in the summer. Another benefit is soundproofing; heavy drapes can help muffle outside noise. Additionally, they enhance the entire décor, establishing the elegance, comfort, or modernism of a space. Curtains are an essential component of interior design, as seen by these several advantages. Factors to Consider How to Choose Curtains for Living Room Size and Shape of Windows Starting points are the dimensions and form of your windows. You can choose curtains that emphasize the beauty of your windows by keeping in mind that not all windows are created equal. Room Lighting and Privacy Needs Think about the use of the space. How to choose curtains for living room? Should a living room have translucent curtains that let in as much natural light as possible, or do you require blackout curtains for a bedroom? Style and Aesthetic Preferences Your choice of curtains should reflect your own style. There’s a curtain style out there for everyone, regardless of your preference for homey country atmosphere or modern minimalism. Fabric and Material Selection From luxurious velvet to casual linen, the fabric you choose can drastically affect your curtains’ look, feel, and functionality. Purpose of the Room First, you need to know where you need to hang your curtain. Let’s figure it out which kind of curtain we need for bedroom, bathroom, living room. Living Room: How to choose curtains for living room? Select materials that strike a balance between privacy and light management. Due of their adaptability and low care requirements, polyester, cotton, and linen are excellent options.Bedroom: Choose materials like velvet, heavy polyester, or blackout fabrics that offer privacy and block light.Kitchen: Choose fabrics that can withstand exposure to culinary smells and spills, such as blends of polyester or cotton, that are sturdy and easy to clean.Bathroom: To avoid mold and mildew, think about using materials that are resistant to moisture, like polyester or synthetic blends. Curtain Insulation Benefits Thermal: Lined curtains or thermal materials act as insulation, keeping rooms cool in the summer and warm in the winter. Ideal for bedrooms and living areas.Thick Textiles: Materials such as velvet, wool, or thick cotton can provide further insulation and soundproofing. Read more- How to Start Gardening at Backyard How to Pick the Finest Materials for Curtains Silken Curtains: You’ll feel more formal in your room thanks to this cloth. Due to the transparency of silk and silk sheer curtains, lining your drapes is essential if you want more privacy. Cotton Curtains: Casual or elegant, cotton curtains fit right in. Cotton or cotton linen curtains are more opaque and more private than other fabric coverings, though they are usually stiffer than other types of curtains. They boast all manner of colors and patterns. Sheer Curtains: Sheer curtains are transparent and lightweight that impart an air of elegance and delicateness to a room. They’re ideal for introducing light, bringing in sunlight and providing the least amount of privacy possible. They are also inexpensive and low maintenance and complement more current or modern decor trends. Velvet Curtains: Velvet curtains are thick, opaque, and lend a sense of sophistication and luxury to a space. They also do a nice job of insulating the space, keeping light out and providing some privacy. Durability of Curtains High-Traffic Areas: Opt for robust materials that can resist repeated usage and exposure, such as polyester, cotton blends, or heavy fabrics.Low-Traffic Areas: Where there is less traffic, delicate materials like silk or linen can be used. Curtain Maintenance Tips Machine-washable: Cotton, polyester, and some blends of linen are machine-washable and require little upkeep.Only Dry Clean: Professional cleaning is necessary for silk, velvet, and certain high-end textiles. Popular Curtain Styles and How to Use Them It is important to understand curtain lengths and rods to create the aesthetic you want. Whether you’re aiming for a dramatic puddle or a precise look that barely skims the floor, the details are important. Step-by-Step Guide to Measuring and Hanging Curtains Window Measurements Start by measuring the width and height of your windows to ensure a perfect fit. You can use Window Tape Measure for measuring your window. It is only $15 at amazon. With this window measuring tool, you can quickly, conveniently, and accurately get the measurement you need without bending or breaking your tape blade! How to Choose Curtains for Home – Rods and Hardware You can buy different curtain rods depending on your window. Here, I included some best reviewed curtain rods from amazon. Let’s check it out- Tips for Proper Curtain Hanging Hanging curtains higher and wider than the window frame can make your windows appear larger and allow more light. DIY Curtain Ideas and Budget-Friendly Options Conclusion How to Choose Curtains

How to Choose Curtains for Home? Experts Tips Read More »